
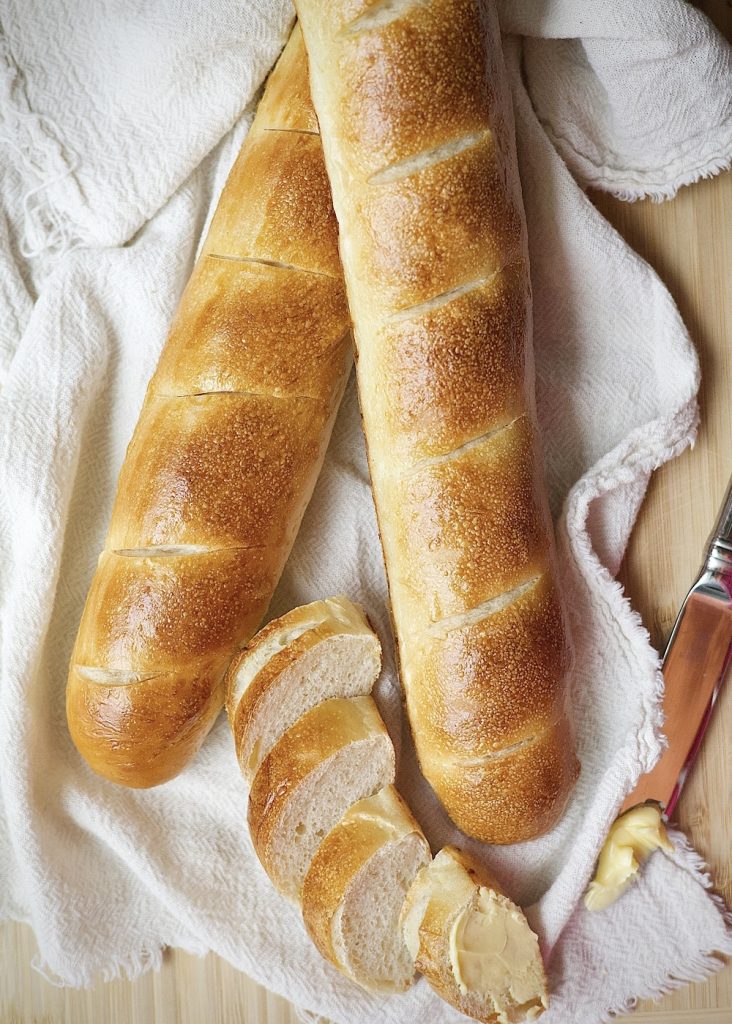
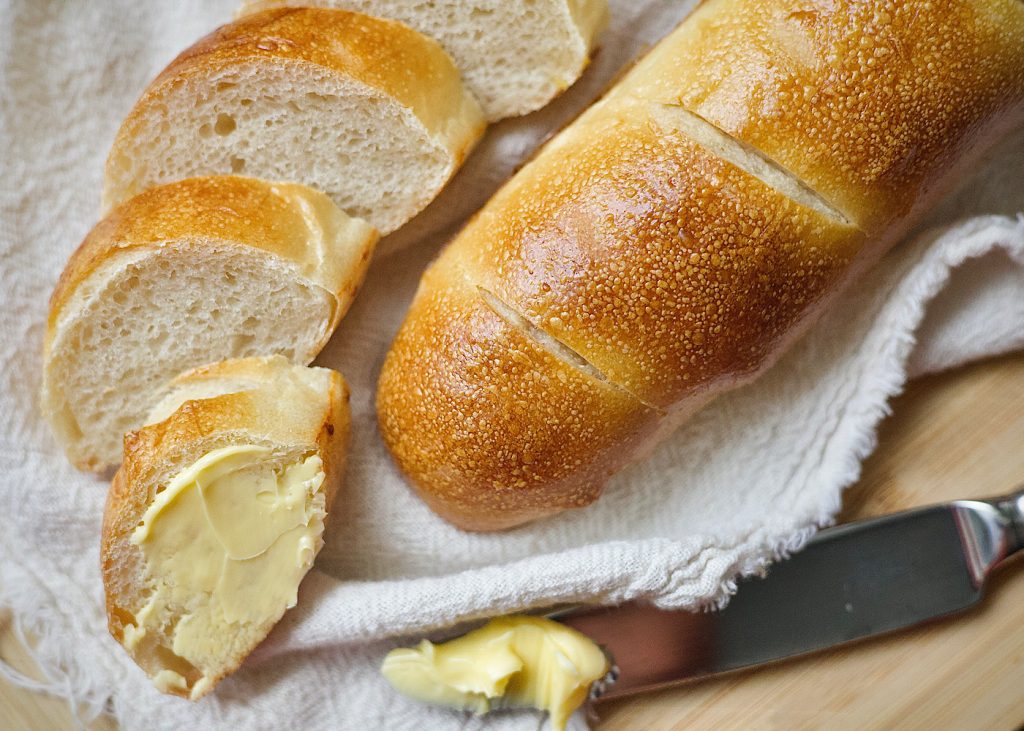
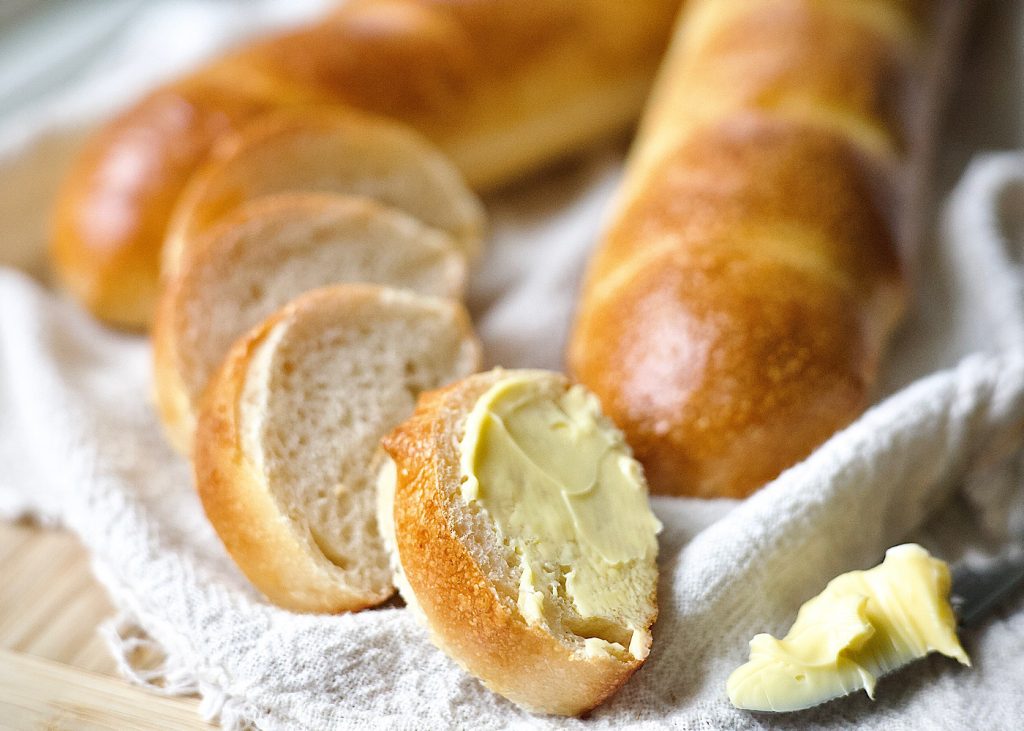
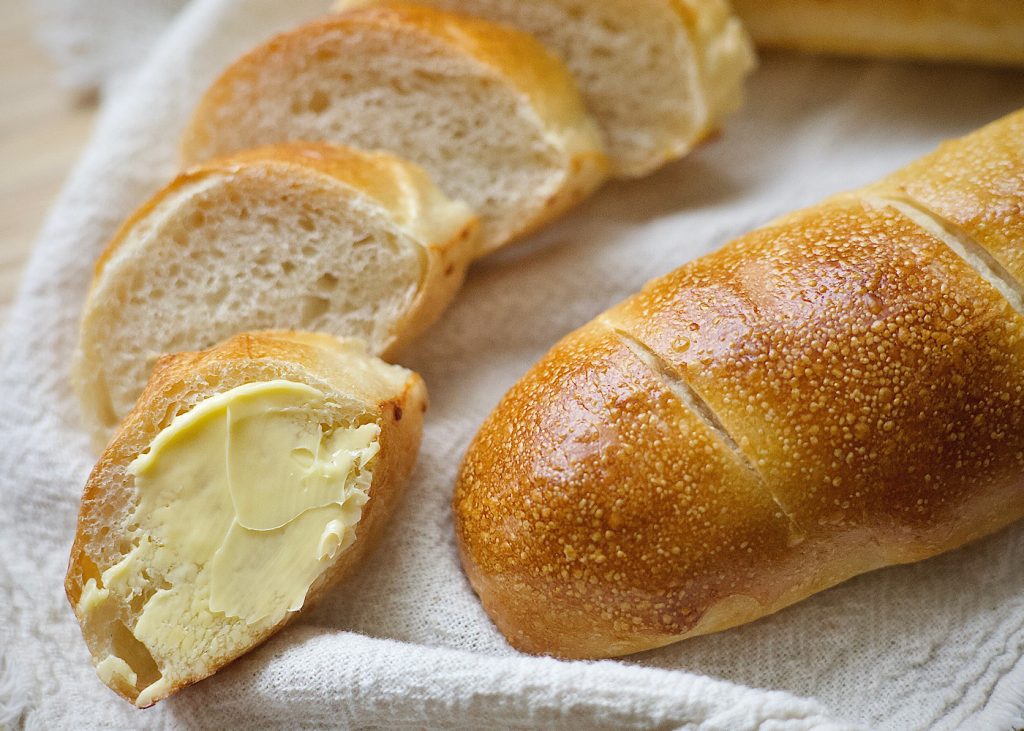
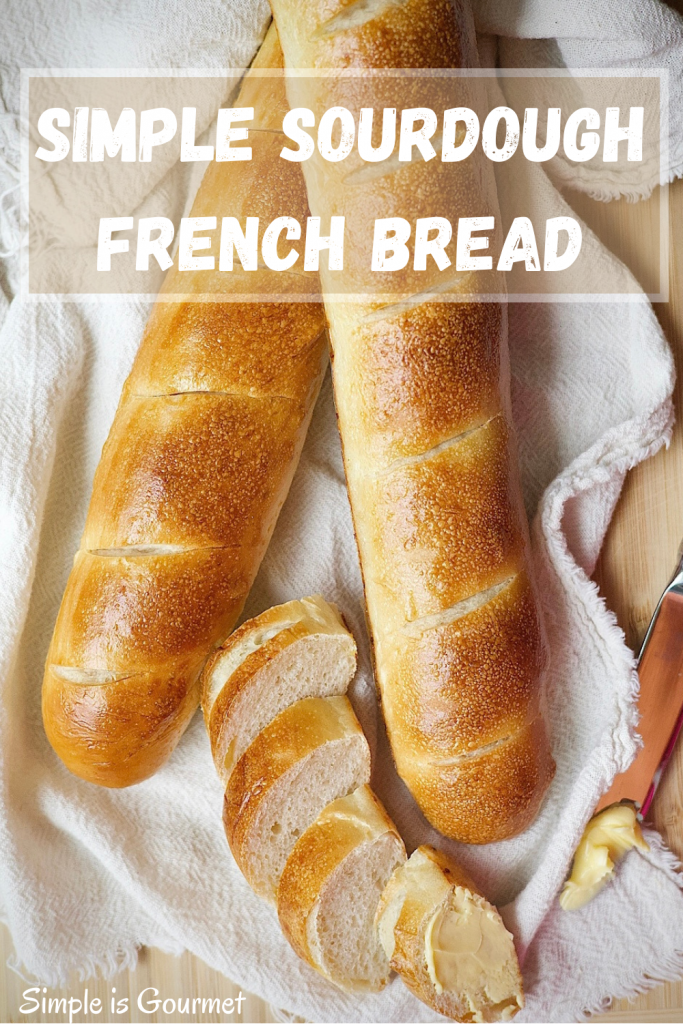
This Simple Sourdough French Bread is recognized by its light and soft crumb encased in a beautiful well-browned crust and even more delectable to eat. It’s a showstopper and sure to be your new favorite sourdough recipe!
This simple sourdough french bread pairs well with any meal. It’s beautiful to showcase and it’s even more deliciously soft, fluffy and chewy on the inside. I often make these loaves on repeat because they are so versatile and everyone loves them.
These french breads pair so nicely with homemade soup and chili. Or get creative and use the loaves to build a sub sandwich, a meatball sandwich or even an open face sub with bruschetta on top.
NEED A SOURDOUGH STARTER?
Before we get started you will need a sourdough starter. If you do not have one yet, here is a Day by Day Guide to help you make your own Sourdough Starter. If you’d like to learn more about the benefits of sourdough, check out my “Why Sourdough?“
Ingredients to make simple sourdough french bread:
- Sourdough Starter
- Bread Flour
- Filtered Water
- Honey, Maple Syrup or Sugar
- Avocado oil
- Unrefined Salt
- Egg
How to make Simple Sourdough french bread
Step 1:
To a stand mixer, add sourdough starter, flour, water, sugar, oil and salt. Mix on high for 5 minutes. This helps work the gluten while fully incorporating the sourdough starter throughout the dough. The dough should be a very pliable ball and not stick too much to your hands.
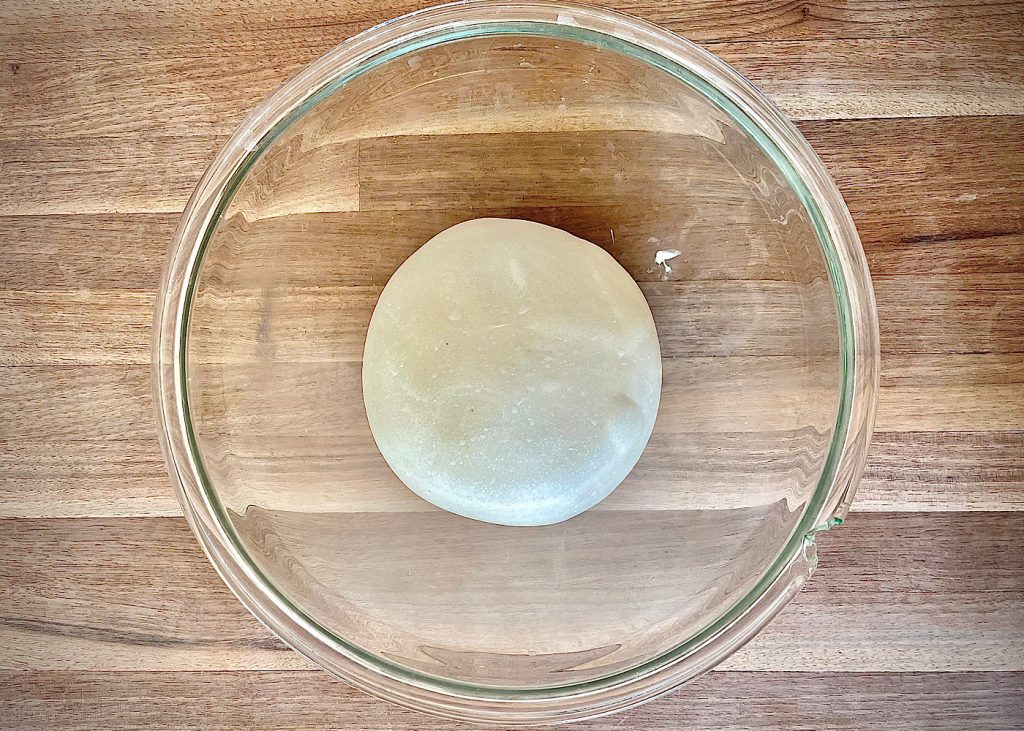
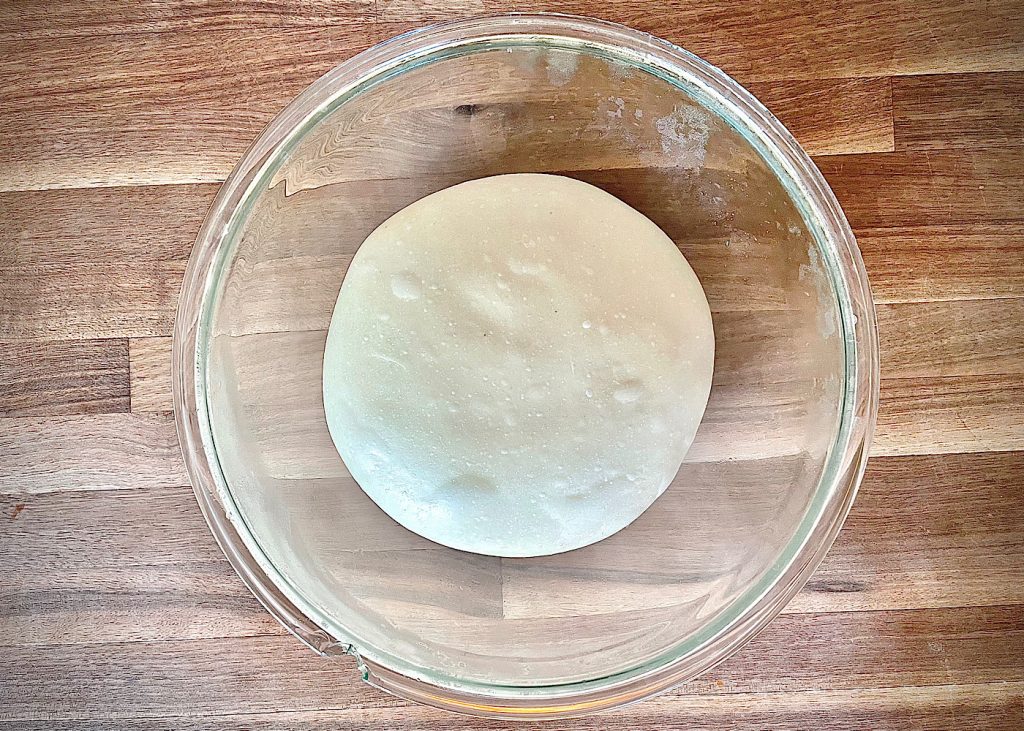
Remove the dough and place into a lightly greased large glass bowl. Cover with tight fitting lid or reusable shower cap to keep in moisture. Place in a warm spot and let dough ferment for 6-12 hours. It should expand and grow to nearly double its starting size.
Remember to watch the dough and not the time. Sourdough is a natural process and dependent on the temperature of your home. If it’s summertime and your home is very warm, your sourdough ferments will go quicker than winter months where your home is cooler. Sourdough thrives in a warm environment.
Step 2:
Once the ferment has doubled remove dough from the bowl and place onto counter. I like to lightly grease my counter so the dough doesn’t stick. You can also use a small smear of water.
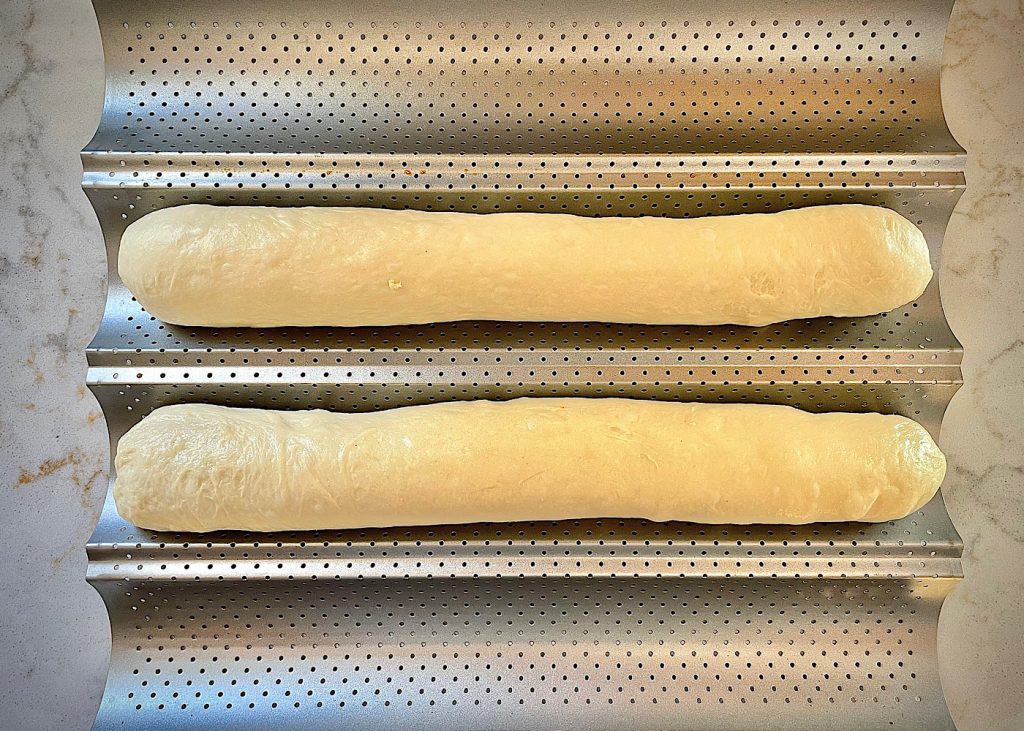
Grab your Kitchen Scale and divide the dough in half making sure both halves are the same weight.
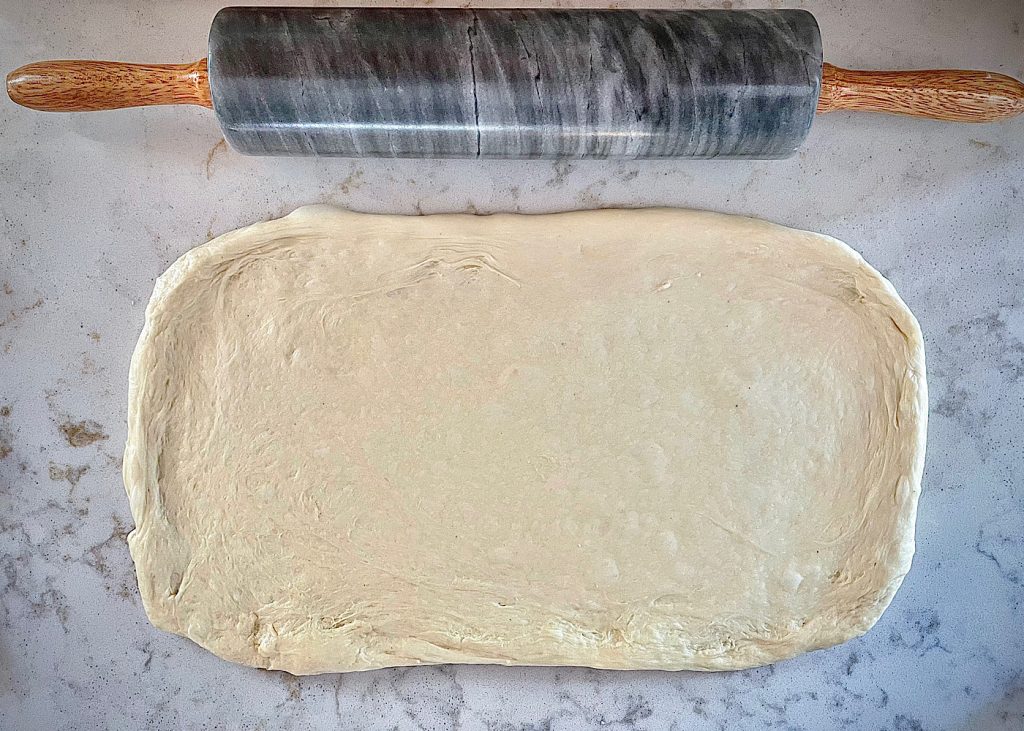
Roll each half into a long rectangle. The length of your dough is how long your bread will be. So make sure it will fit onto your cooking pan.
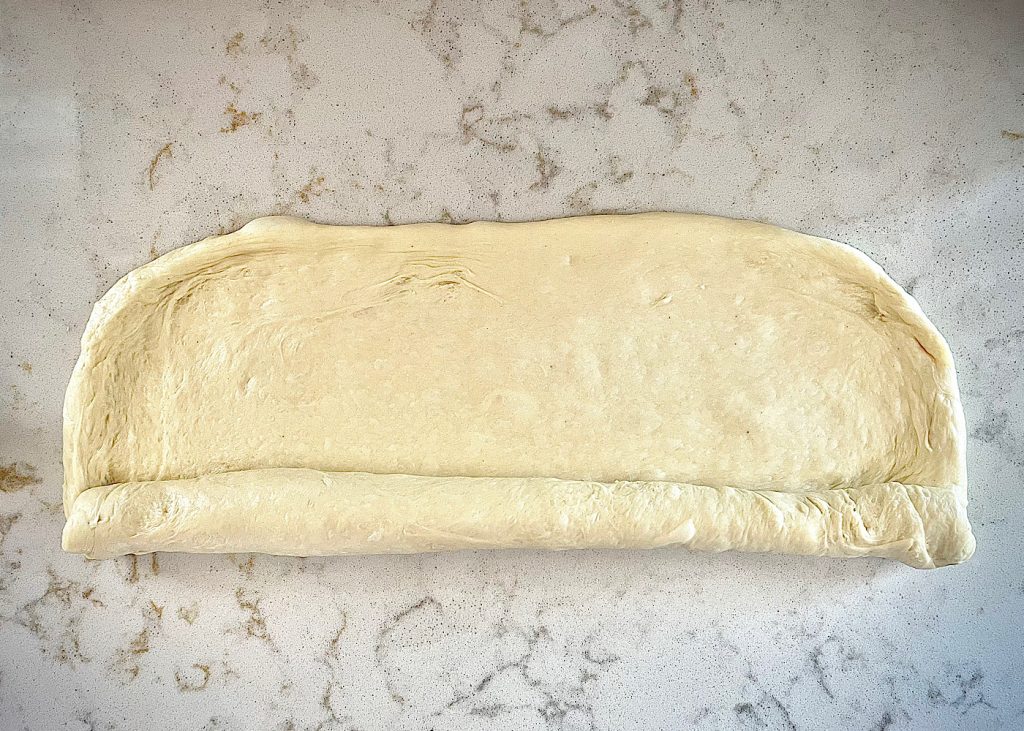
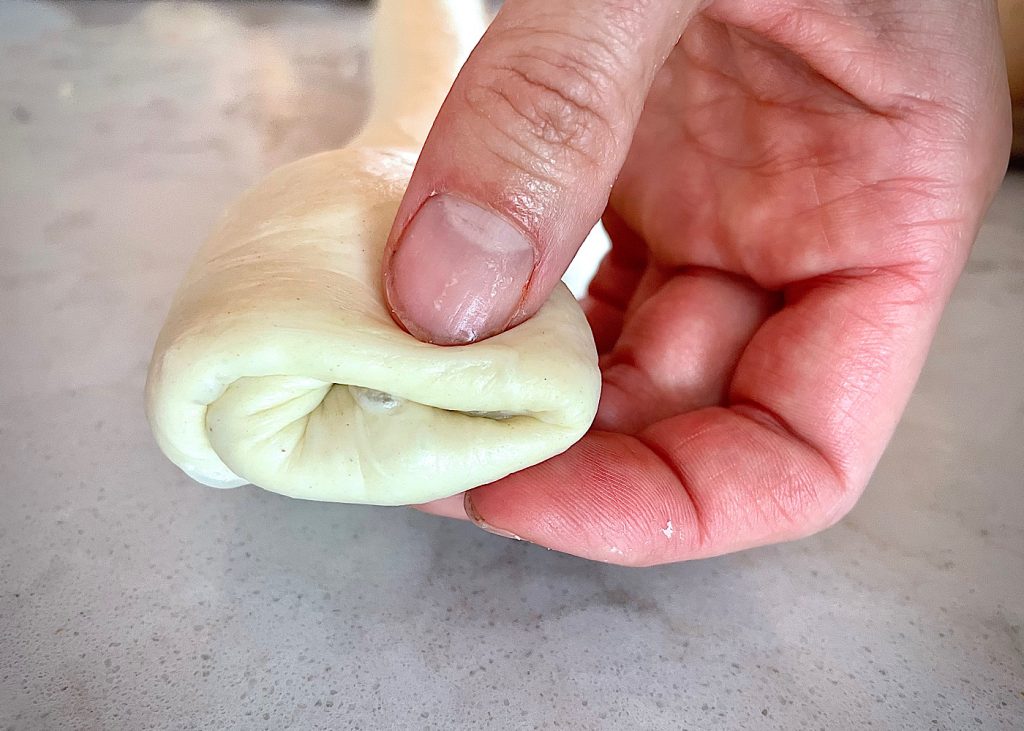
Starting with the long side closest to you, roll each rectangle into a log similar to a cinnamon roll. Pinch the seams together both on the long side and at the top and bottom of the log. You can even tuck the ends gently underneath the log to make sure the seam stays pinched shut during cooking.
Place dough logs onto a french bread baking pan. If you don’t have one you can also lay them onto a cookie sheet. The baking pan does help hold the shape and structure, while also allowing them to bake evenly because of their ventilation.
It does make baking these easier so if you plan to bake a lot of french bread I recommend investing in a french bread baking pan.
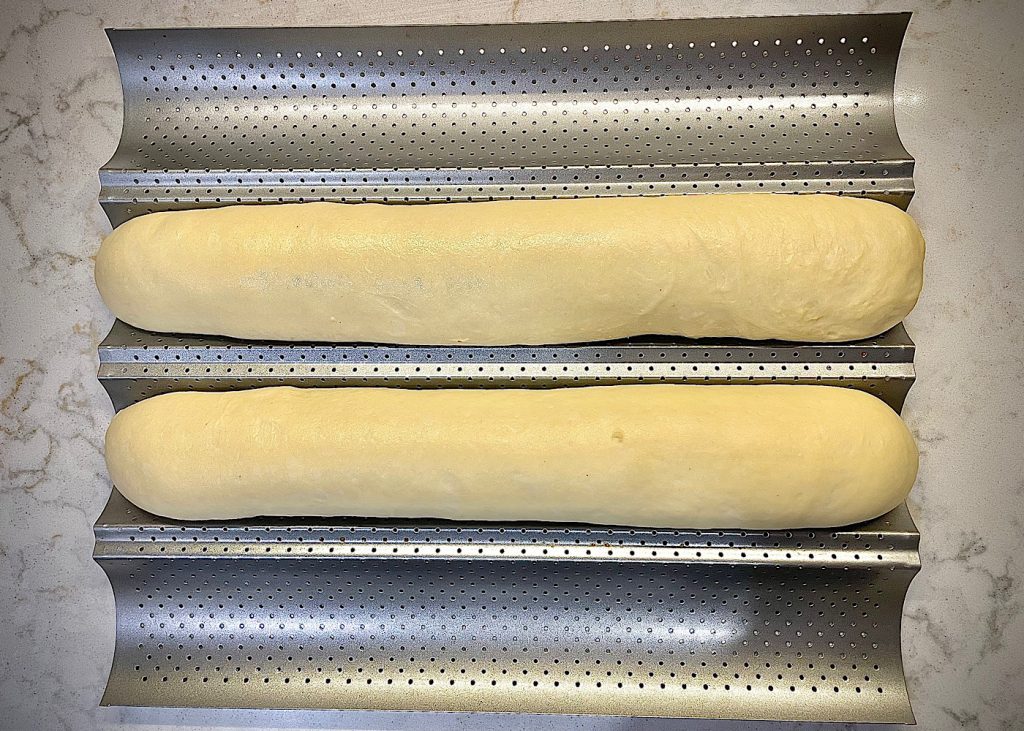
Step 3:
Proof the dough logs for 1-2 hours. They should get nice and puffy during this time.
Step 4:
Preheat oven to 400 degrees F.
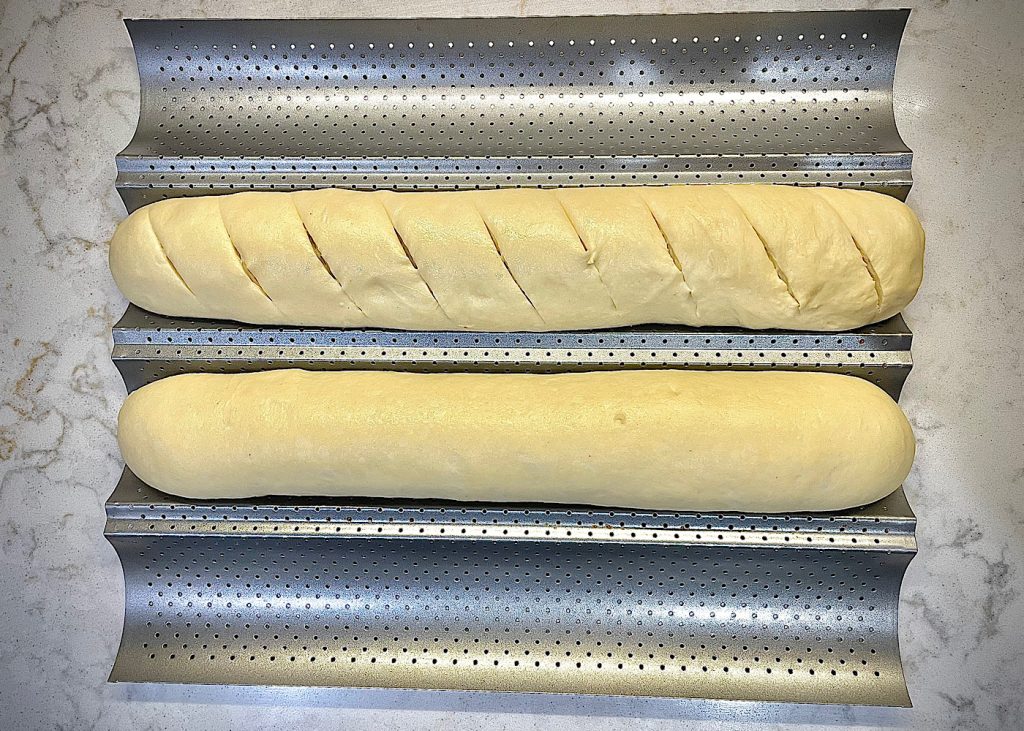
Grad an egg and add 1 tsp of water. Mix together water and egg and brush onto each dough log. Using a bread lame slash diagonal lines down each log. Or if you prefer one long line down the center from one end to the other, by all means go that route! The cuts allow the bread to rise and expand during baking.
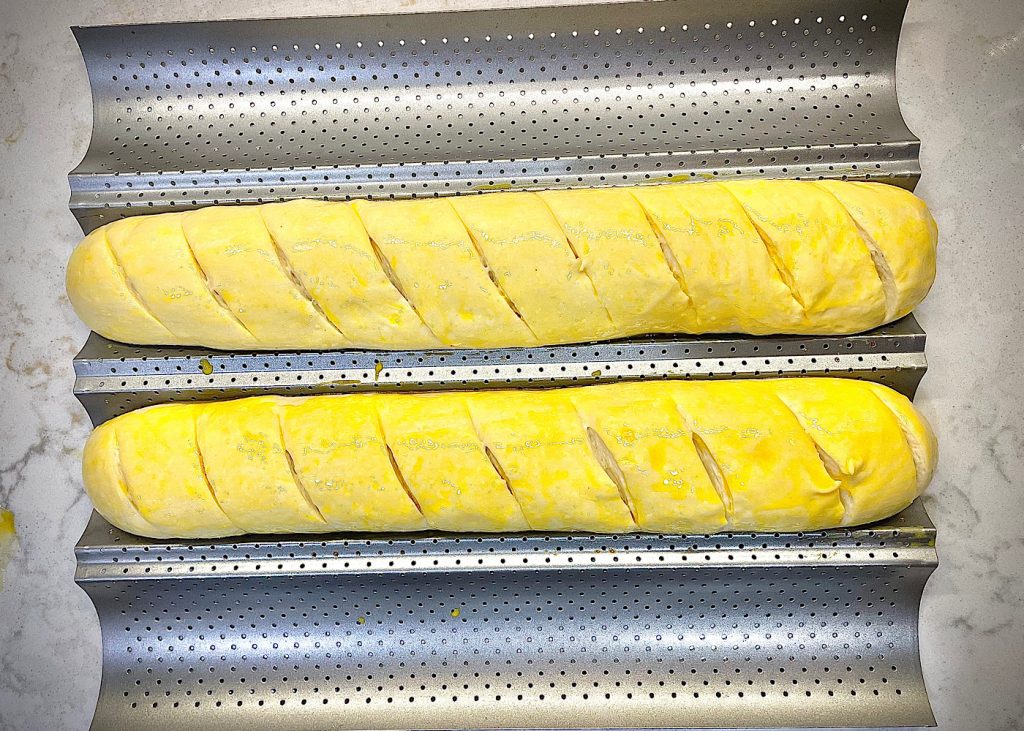
Bake the loaves for 17-20 minutes until they are golden brown on the outside.
Allow them to cool slightly and enjoy!
Struggling to get your sourdough starter to rise?
As I stated above, sourdough thrives in a warm environment. So what do you do in the winter when your house is below 70 degrees? Well you can either allow more time for the ferment. Or you can help aide your sourdough ferments by using a seedling mat.
Simply place your seedling mat onto the counter, plug it in and place the bowl of fermenting sourdough on top. The mat gives off a minimal amount of heat and it’s just enough to help aide the ferment. It gives it that warm environment needed to thrive.
Have you ever used this method before? I live in the Midwest and winters get cold! This is an absolute necessity for me to get through those cold winter months. Because after all, winter and fresh bread just go together!
10 ideas to use with simple sourdough french bread
- French Bread Pizzas
- Pair with soup or chili
- Sub Sandwiches
- Meatball Sandwich
- Open faced with bruschetta or cut log to dip bread into bruschetta
- Garlic Bread
- French Toast
- Top with Spinach and artichoke dip
- Mini Grilled Cheese Sandwiches
- Crazy enough but you can turn it into croutons or homemade bread crumbs
Pin for Later:
Let’s make Simple Sourdough French Bread

Simple Sourdough French Bread
This Simple Sourdough French Bread is recognized by its light and soft crumb encased in a beautiful well-browned crust and even more delectable to eat.
Ingredients
- 100g Sourdough Starter
- 450g Bread Flour
- 250g Filtered Water
- 1/4 cup Honey, Maple Syrup or Sugar
- 2 Tbsp Avocado oil
- 2 tsp Unrefined Salt
- 1 Egg + 1 tsp water (for egg wash)
Instructions
1. To a stand mixer, add sourdough starter, flour, water, sugar, oil and salt. Mix on high for 5 minutes. *Dough should be pliable and not stick too much to your hands. If using honey or maple syrup add an extra tablespoon or two more of flour until dough is no longer sticky.
2. Place dough into a lightly greased large glass bowl. Cover with tight fitting lid or reusable shower cap to keep in moisture. Place in a warm spot and let dough ferment for 6-12 hours. *It should expand and grow to nearly double its starting size.
**Optional Stretch and Folds: After Dough is mixed, place into a covered greased bowl. Rest dough for 30 minutes then perform your first set of stretch and folds. Take your hand and reach under the side of the dough. Gently pull dough upwards and fold over itself. Turn the bowl 1/4 turn and stretch the dough again and fold. Repeat 2 more folds for a total of 4 times. Cover and rest dough for more 30 minutes. (I recommend setting a timer to alert you) Perform a total of 4 stretch and folds every 30 minutes for two hours. This is not necessary but really helps build structure in the dough and I do highly recommend doing it if you have time.
3. Using a Kitchen Scale divide the dough in half making sure both halves are the same weight.
4. Roll each half into a long rectangle. *The length of your dough is how long your bread will be. So be sure it will fit onto your cooking pan.
5. Starting with the long side closest to you, roll each rectangle into a log. Pinch the seams together both on the long side and at the top and bottom of the log. You can even tuck the ends gently underneath to make sure the seam stays pinched during cooking.
6. Place dough logs onto a french bread baking pan. *If you don't have one you can also lay them onto a cookie sheet. And proof the logs for 1-2 hours in the oven with the light on. *Please don't turn your oven on during this time! Dough should get nice and puffy.
7. Remove proofing dough from oven and Preheat oven to 400 degrees F.
8. Add 1 egg and 1 tsp of water to a small bowl and mix together. Brush egg wash onto each dough log. Using a bread lame slash diagonal lines down each log. Or if you prefer one long line down the center from one end to the other, by all means go that route!
9. Bake at 400 degrees for 17-20 minutes, until they are golden brown on the outside. Allow them to cool slightly and enjoy!
Notes
For a longer ferment you can cold proof in the fridge for up to 24 hours after the second proof. Remove and allow them to come to room temp then follow baking directions.
To freeze, wrap tightly in parchment paper or plastic wrap and place in plastic bag with air removed so they don't get freezer burnt. Good frozen for up to 2 months.
RECIPE UPDATE: *Due to comments made that the dough has been too sticky for some, I have reduced the sourdough starter amount down to 100g. After many successful rounds of this, I have updated this recipe to reflect the changes I have found to be best for this recipe. Going forward, I advise everyone to pay attention to their dough more than the time the recipe calls for. This is true for all sourdough recipes. The dough will always tell you when to move on to the next step, and if you rely on the time more heavily, it may result you with an over proofed and very sticky dough. So watch you dough carefully! Hope this is helpful! Happy Baking!
Links:
This post contains affiliate links. I receive a small commission at no extra cost to you. Thank you!
 Skip to Recipe
If you don’t have a stand mixer like yours, can you use a Kithenaid mixer with a dough hook or just knead by hand?
Absolutely, use your kitchen aid with dough hook! Or by hand if you’re looking for a small work out 🙂
I followed this recipe exactly. Added extra flour as I used honey. But my dough is SO sticky, it doubled after doing 2 hours of folds. But it’s still so wet, I’ve shaped and fermenting in oven but it’s like it’s melting (no the oven isn’t on) I’m sure it will taste fine but how do I make it not so sticky!? After each fold I added more flour hoping it wouldn’t stick but by the next fold it was sticky again!
Oh no! I’m sorry to hear that, I make this recipe SO often and haven’t dealt with a sticky dough like what you’re saying. Did you use bread flour? I always recommend using bread flour and you could try to add a little whole wheat. Both bread flour and whole wheat will help absorb more liquid and combat stickiness. But it also sounds like your dough doubled in size very quickly. When making sourdough I recommend paying more attention to the dough than the timing of the recipe. Your environment may be warm so it will ferment a lot faster. If it doubled in size quickly, then move onto the next step which is shaping then proofing and forgo the timing on the recipe. Because over proofed sourdough will ALWAYS be sticky and hard to handle. Those are my suggestions, I’m so sorry you had that experience but I hope that was helpful 🙂
Do you use sugar, honey, or maple syrup? Mine has turned out very wet, sticky, as well.
The bottom of the loaf did not cook correctly. Any advice? The top was brown and the temperature registered 190.
Maybe it was the pan, or sounds like the oven wasn’t hot enough.
This dough was really wet after 12 hours sitting in the oven. I’ve made plenty if bread and not sure if ratios are off? We used bread flour in this recipe. Even adding flour it was just a blob. I stretched it w wet hands like I do my sourdough loaves to try to increase the gluten and have it more manageable and not sure what happened but ended up tossing it.
My dough came out way too wet & sticky. Perhaps I let it proof too long. I couldn’t form it so I tossed it in a loaf pan & we will see how it bakes/tastes.
YES, it sounds very over proofed. As we near the warmer summer months, your sourdough recipes will ferment a lot quicker. I recommend using the recipe time stated in the directions as a guide and more carefully pay attention to your dough. Once it has nearly doubled, it is ready. That may mean your dough will be proofed and ready a few hours before the recipe directions say. So always pay more attention to your dough than the actual time. Sorry to hear it was hard to work with, I hope you were still able to enjoy it 🙂
Mine turned out really wet and sticky too and I followed the instructions to a T. I didn’t let it over proof – just checked it multiple times until it had risen and had some light aeration to it. Going to try to bake and see what happens
Does it need to be a glass bowl?
Nope! Any large bowl will do
Hi! If I want to wait to bake these, at what point can I put the dough in the fridge until I’m ready? After the second proof when they are in log shapes? If so, how long can I do this for? Asking because I only just realized the first proof won’t be done until 10:30pm tonight. Whoops!
I would add the dough to the fridge after the first ferment and then remove, shape and do the second proof when you’re ready. You risk the logs deflating if you shape and proof them then add to the fridge.
Are you baking directly on the oven rack or a stone?
I use a french loaf pan when I’m baking. You can certainly use a stone or cookie sheet. Just be sure to roll the dough tightly so they don’t flatten on you. The loaf pan really helps keep their shape.
Yes, I understand you’re using a French loaf pan. I am too. My question is, are you setting that on the wire racks in the oven or on a stone or metal baking steel. Thank You…….Im guessing you are setting it directly on the oven grates.
Yes, right on the wire racks 🙂
Do you use leftover starter or active starter?
Active Starter 🙂
Can you use AP Flour and Olive oil as a substitute?
You could, but you may need to adjust and lessen the water amount 15-25 grams if using AP. Bread flour has a higher protein content giving off a better rise to this recipe, that is why I recommend Bread flour. And yes, you can sub Olive oil for Avocado oil
I like this recipe! For the comments saying their dough was too runny: 200 grams of starter is a lot for 450 grams of flour, it will definitely rise faster than other recipes with less starter, even in the winter. I prefer to make this dough in the morning, which let’s me keep an eye on how it looks. Let it rise about 4 hours, shape and rise for about another 2-3 hours. I found that this was an ideal time for a perfectly fluffy loaf. The dough itself was a bit too sticky initially when I mixed it and I ended up adding about 80grams more flour in. I kneaded it in my mixer and skipped the stretch and folds. My family absolutely loved it. Made french toast with the leftovers, absolutely devoured. Thanks for the recipe.
The only part of the recipe that doesn’t compute is letting the loaves cool… my teens and hubby are swarming when I’m pulling it out of the oven. I’ve made the recipe 2 times now and I declare that it’s officially my go to baguette recipe. It’s delicious, thanks so much for the great recipe with easy to follow instructions!
Too funny! Love this Steph, thanks for sharing your family’s love for this recipe!
The optional stretch and fold is this after the fermentation or stretch and fold after mixing then ferment or no fermenting after the stretch and fold
Stretch and Fold after mixing before the bulk ferment.