
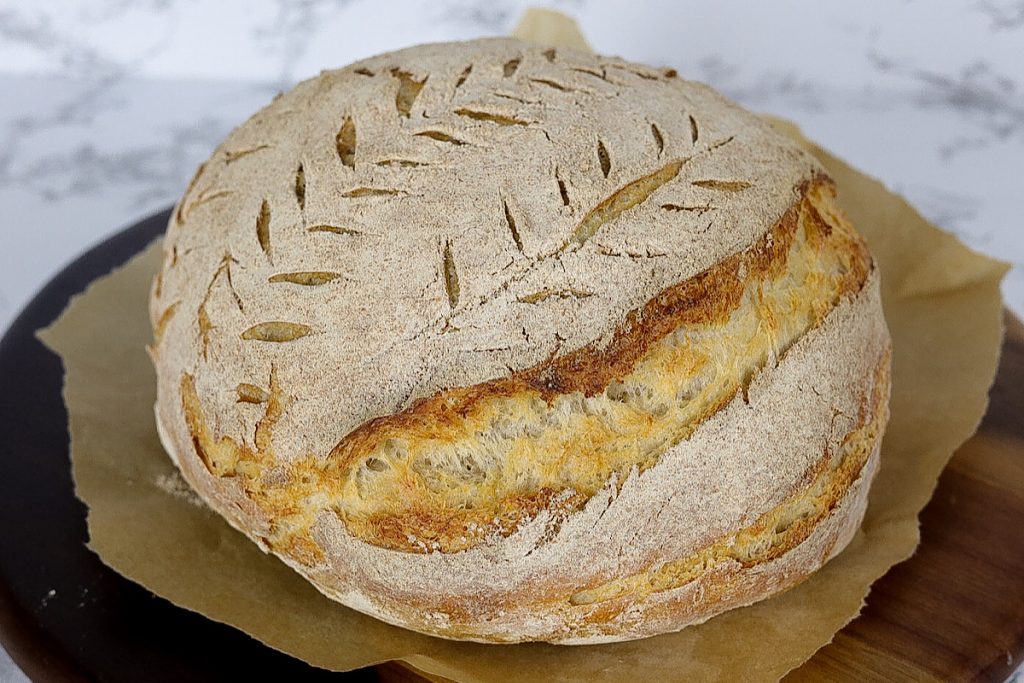
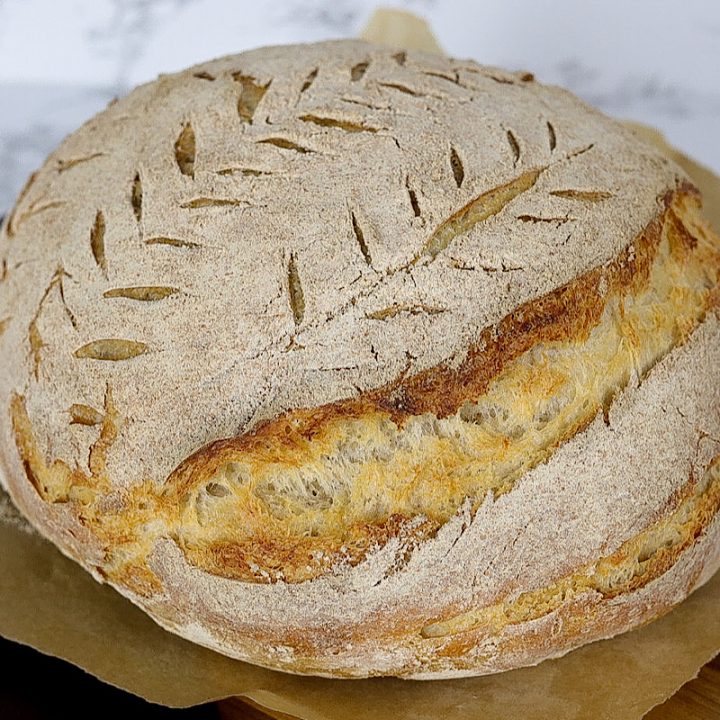
Whether you’re a sourdough pro or just starting out, this loaf is for you. It’s perfectly soft and fluffy on the inside and deliciously crunchy on the outside. Add a little farm fresh butter and some raw honey and the entire loaf might just get devoured in one sitting.
What you need to get started
- Kitchen scale
- Large glass bowl
- Towel for covering dough in bowl
- Medium bowl or Banneton (link below)
- Parchment paper
- Household razor blade, bread lame or sharp knife to score bread before baking
- Dutch oven to bake your bread in
Sourdough thrives with precision and a kitchen scale guarantees consistency. It took me a whole year of failed loaves to figure this out. Below is the link to the kitchen scale I use.
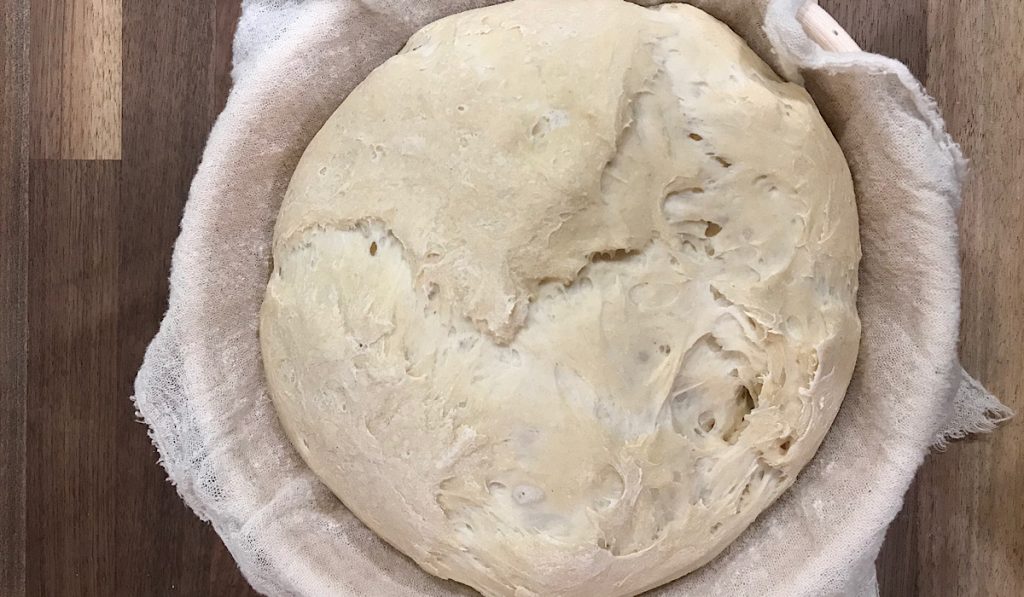
A large glass or plastic bowl is needed for the dough to rest in. Do not use metal or the natural yeast may react against it. Use a towel to cover the dough between folds.
Shape your dough then add it to a banneton to proof. If you don’t own one of these yet, you can simply use a medium size bowl with a tea towel or cheesecloth laid in the bottom. Flour the towel liberally so the dough doesn’t stick to it. If you want one of these cool baskets, my link is posted below.
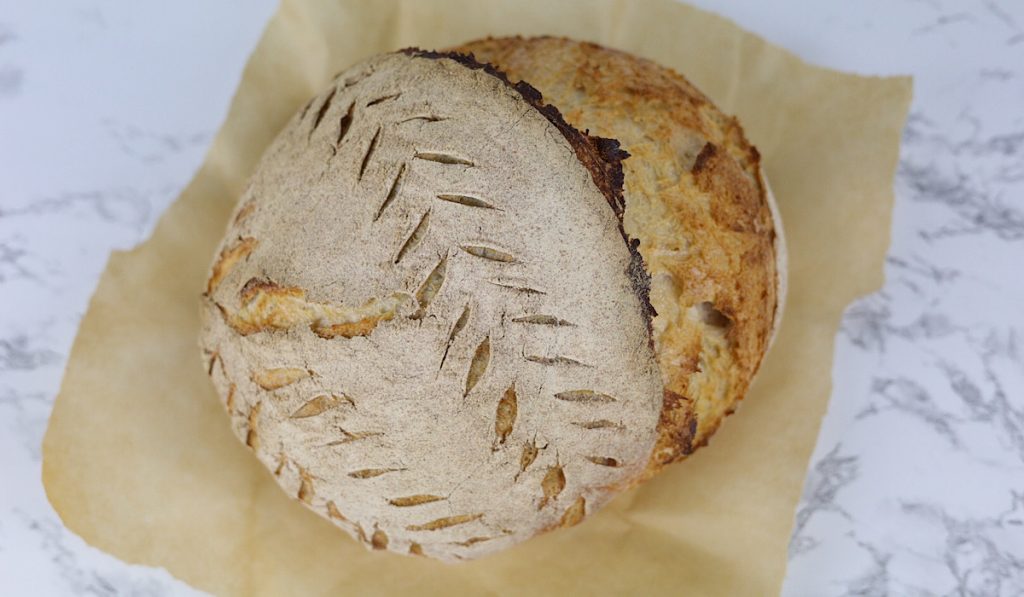
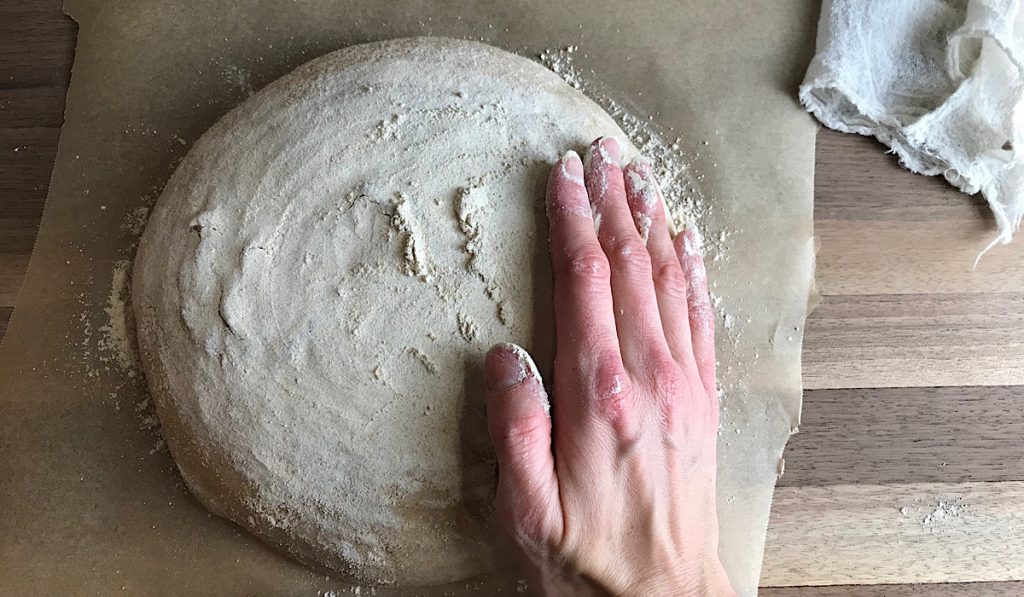
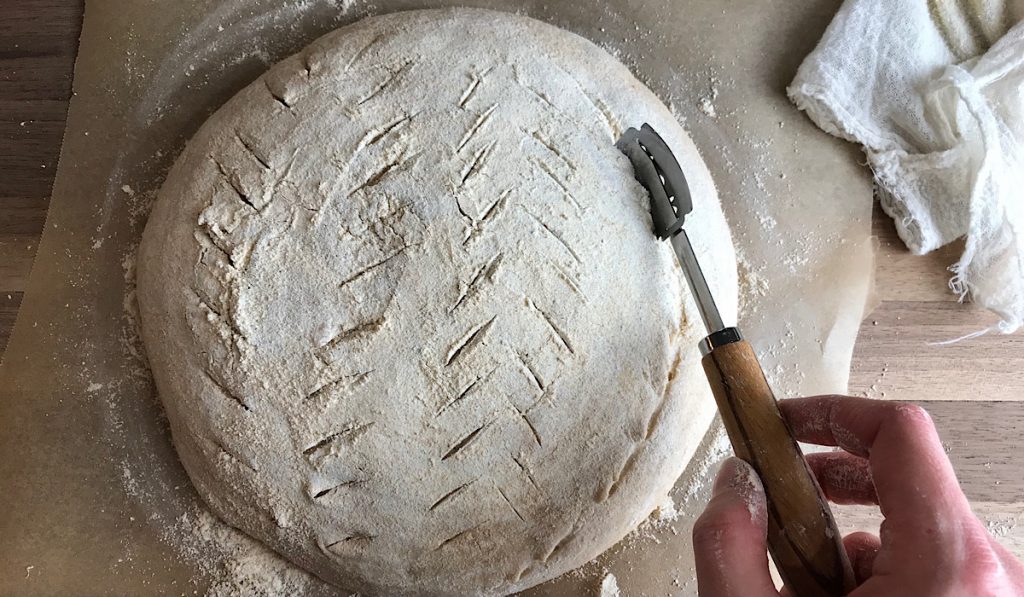
After your dough proofs, flip it onto parchment paper and score it with a sharp blade. The score marks allow your bread to open up and expand as it cooks. Scoring can be as simple as an X on top or as detailed as leaves covering your entire loaf. The possibilities are endless. Have fun with your designs and experiment with each new loaf you make. If you forget this step, it’s ok. The bread has a mind of its own and will still turn out great.
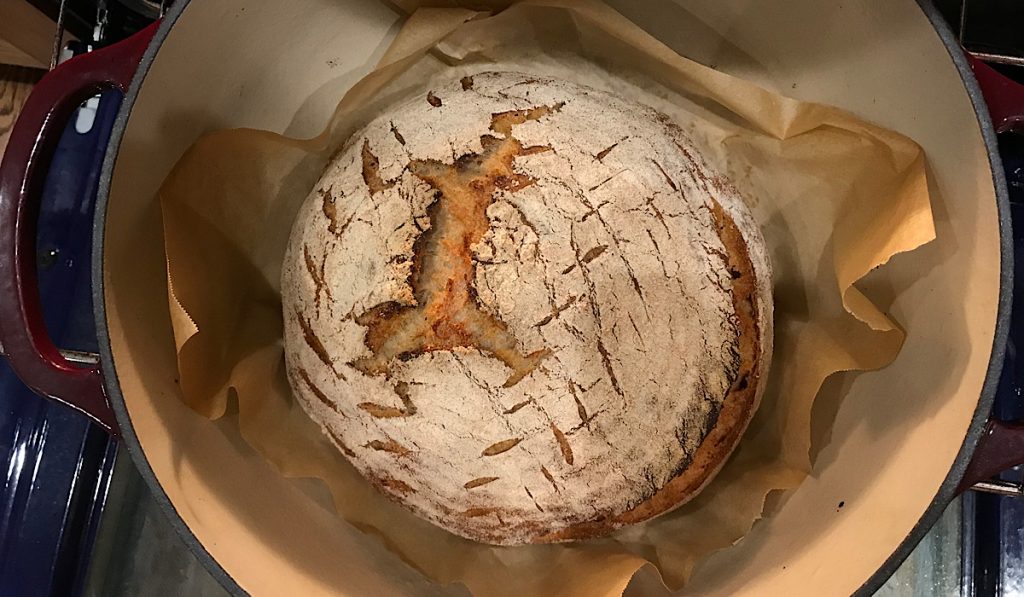
I highly recommend baking your bread on parchment paper in a preheated dutch oven. The steam released from the dough is captured within the dutch oven and gives your bread that delicious, crunchy outer layer.
If you do not own a dutch oven, you can preheat your oven for 30 minutes with a cookie sheet on the bottom rack. When you add your dough wrapped in parchment paper to the upper rack, pour two cups of water into your cookie sheet. Quickly close the door to capture the steam in the oven. This will help your dough rise and give it the crunchy outer layer we all love.
Only 3 Ingredients
- 175 grams active sourdough starter (that passes the float test)
- 300 grams filtered water
- 450 grams unbleached flour (not enriched, and I always recommend organic)
- 12 grams unrefined salt (I love to use pink himalayan salt)
It’s pretty amazing that this delicious loaf only contains 3 ingredients. It’s why I love homemade sourdough and especially this beginner’s sourdough loaf. The ingredients are simple and it’s easy to make. If you still need a starter of your own, click here to learn how to make one. To read more about the benefits of sourdough, click here.
What’s the float test?
Fill a small cup full with water. Remove about a teaspoon of your active starter and place in the cup of water. If it floats, your starter is active and ready to bake with. If it sinks, give your starter another feeding and try again in about 4 hours. This test is not necessary each time you bake. It is really just a technique you can use to help you determine if your starter is active enough. The more you bake and get a feel for how your starter works, you will no longer need to do the float test.
Try This!
To keep my Sourdough Bread moist and soft much longer (if it even lasts that long) I add 1 Tablespoon Avocado Oil and 1 Tablespoon Raw Honey to the water and starter mixture at the beginning of the bread making process.
This addition keeps my bread nice and soft and prevents it from becoming a little dry as it sits on the counter for a few days. Give this a try and let me know how you like these simple additions.
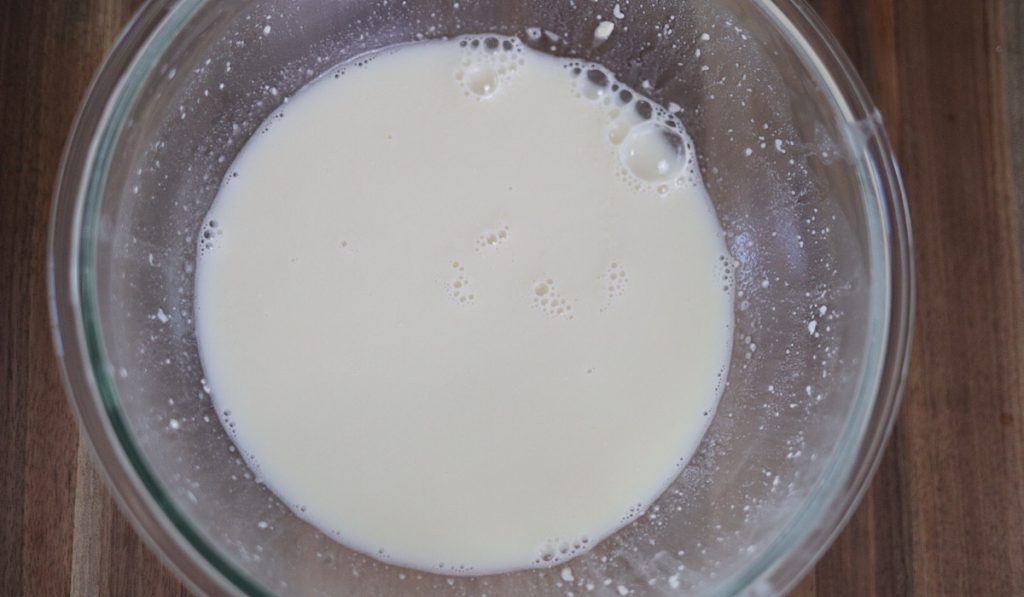
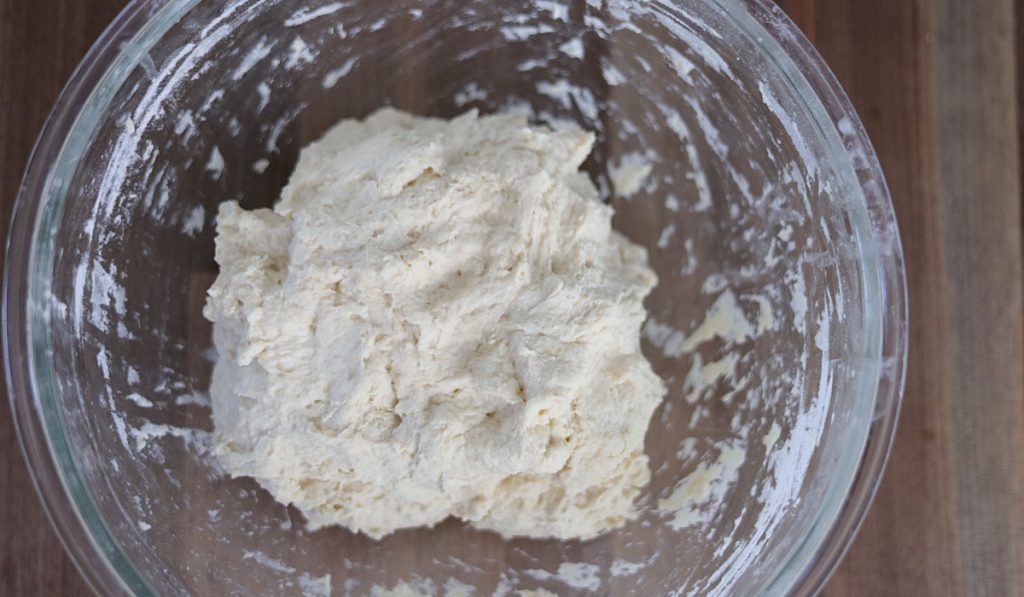
Here are a few helpful pictures of the bread making process.


Let’s get to baking! Is this your first time baking with your starter? Or are you experienced and looking to try new loaves of bread? I would love to hear if you made this simple artisan sourdough bread and how you enjoyed it!
Struggling to make sourdough rise in the winter?
Try this Seedling Heat Mat. It’s a 20×10 mat that lays flat on your counter. It plugs into the wall and gives off a very small amount of heat (like really small).
Simply place your dough on this mat to help your dough rise during the cool winter months.
I get asked often how to rise dough in a cold house during the winter. My suggestions are to place your dough in the oven with the light on, or slightly warm your oven a few seconds and then place dough into a warm oven, or add dough on top of your refrigerator where it’s warm OR this using this Seedling Heat Mat. I have had great success with it, and would recommend it to anyone to use when the house gets cold.

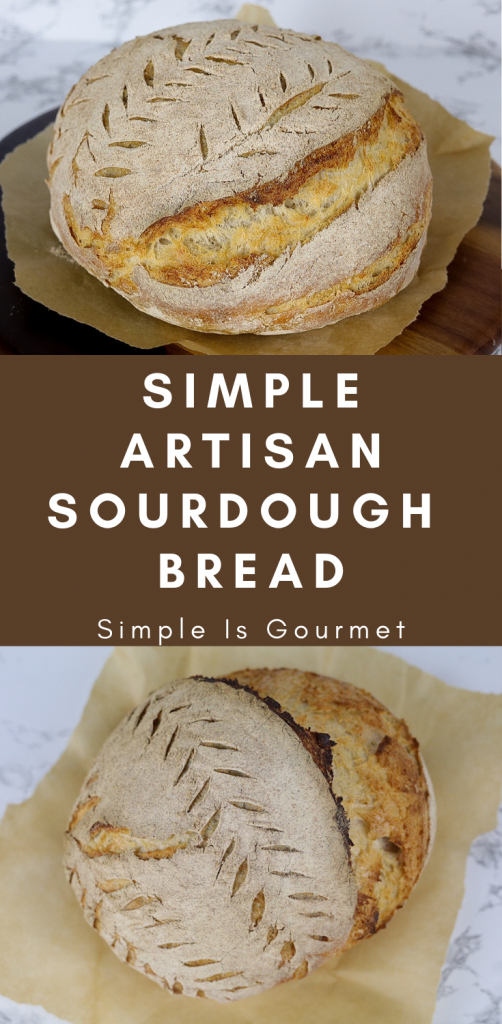
Simple Artisan Sourdough Bread
Ingredients
- 175 grams active sourdough starter (that passes the float test)
- 300 grams filtered water (room temperature)
- 450 grams unbleached flour (not enriched, I recommend organic)
- 12 grams unrefined salt (I love pink Himalayan salt)
Instructions
1. Add 175 grams of active starter to a large glass bowl. Pour 300 grams filtered water on top of starter. Using your fingers, whisk starter into water until it's evenly distributed. It will become a cloudy water.
2. Add 450 grams unbleached flour to the water/starter mixture. Using your hands, mix all of the ingredients together until just incorporated.
3. Cover and rest in warm area for 1 hour.
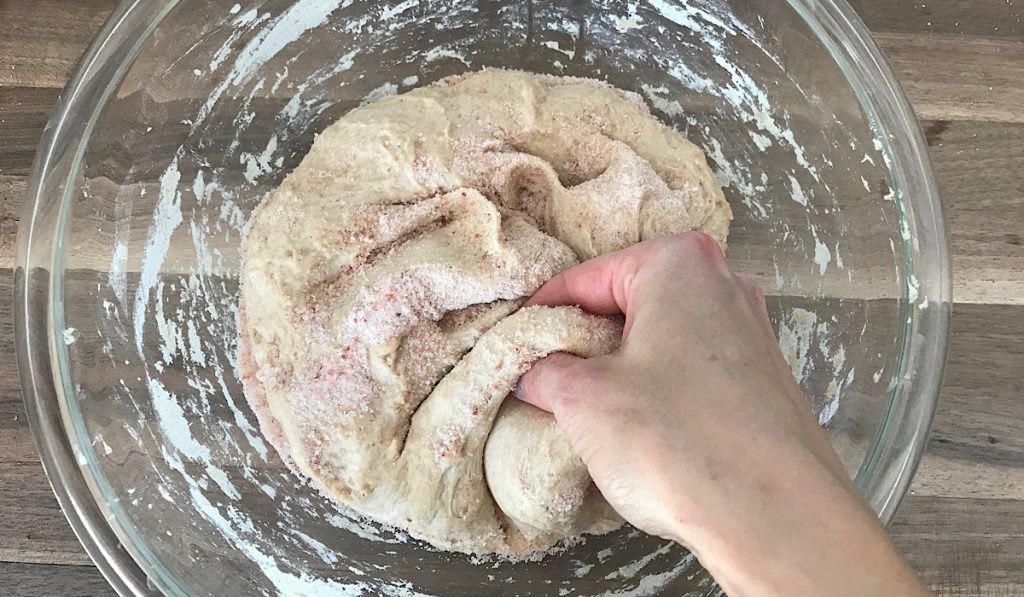
4. Sprinkle 12 grams of unrefined salt over the dough. With your fingers, pinch in the salt. No need to mix here, just pinch it in. Rest for 30 minutes.
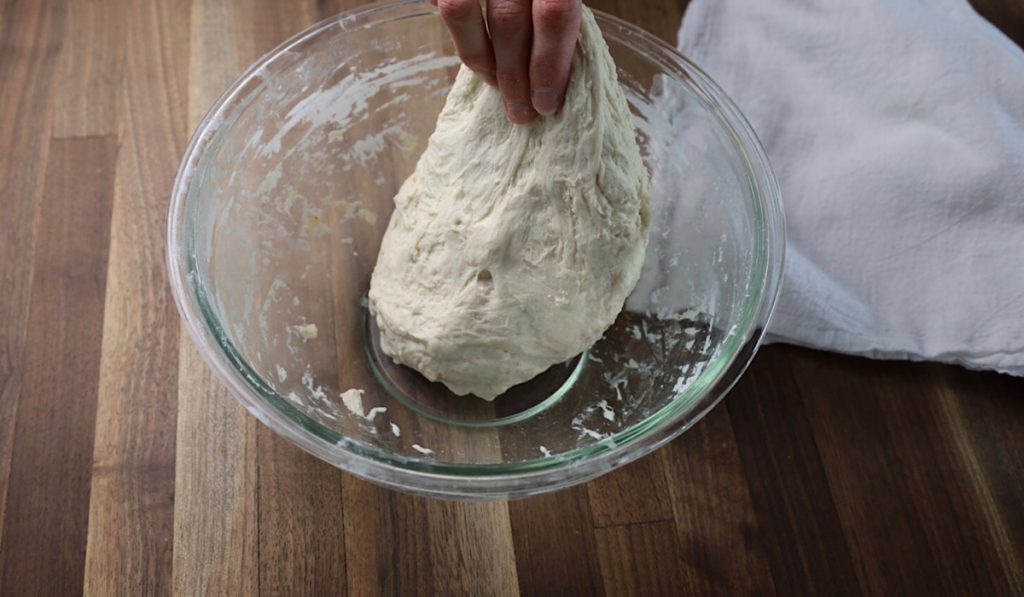
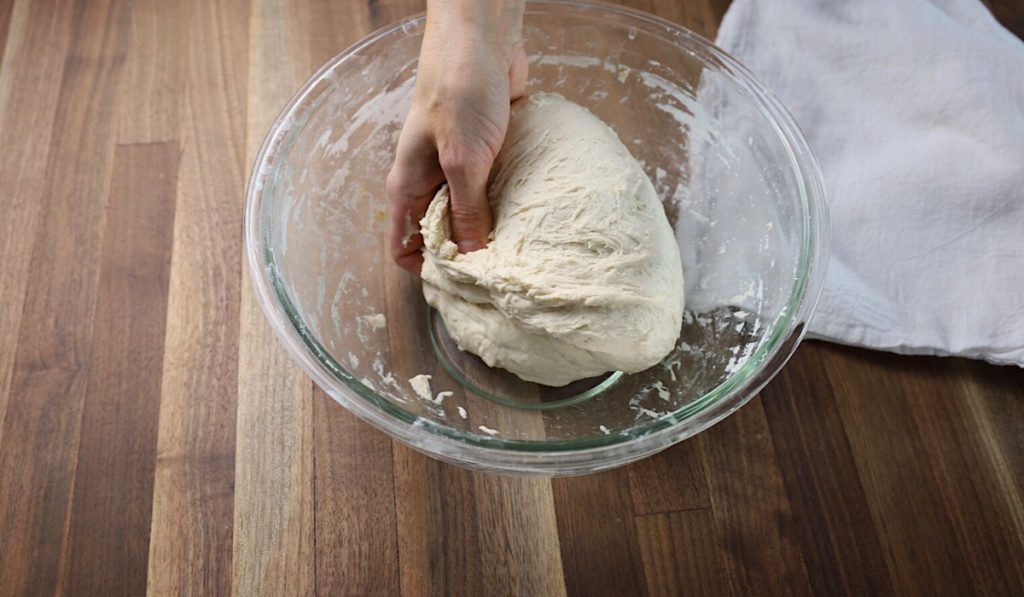
5. First stretch and fold: Take your hand and reach under the side of the dough. Gently pull dough upwards and fold over itself. Turn the bowl 1/4 turn and stretch the dough again and fold. Repeat 2 more folds for a total of 4 stretch and folds. Cover and rest dough for 30 minutes. I recommend setting a timer to alert you.
6. Second stretch and fold: same instructions as step 5. Complete 4 folds. Cover and rest for 30 minutes. Don't forget to reset the timer.
7. Third stretch and fold. Complete 4 folds. Cover and rest for 30 minutes. The gluten is starting to develop and you should start noticing that the dough is easier to work with.
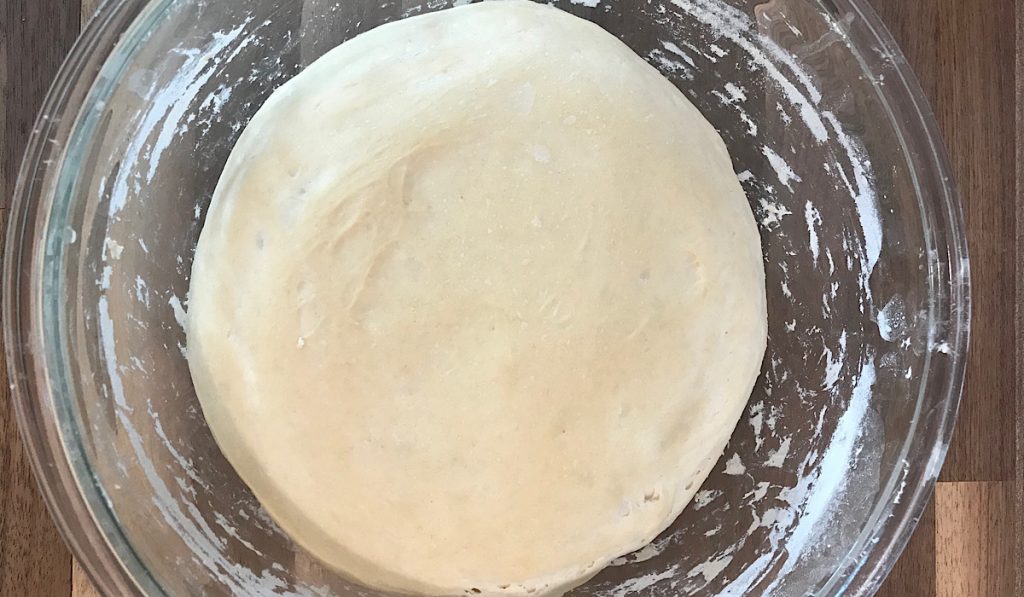
8. Fourth and final stretch and fold. Complete 4 folds. Cover and rest in the bowl for 3 hours.
9. Remove dough and shape into a ball. Place on counter seam side down. Gently pull dough towards you on the counter to pinch the seam underneath and create surface tension on the top. Turn and repeat until your ball is tight and round. A tight ball will rise better.
10. Line a bowl or banneton with a tea towel or cheese cloth and sprinkle slightly with four. Scoop up your ball and place in the bowl seam side UP. Cover and proof for 2 hours to let it rise.
11. Option 1: Preheat Cast Iron Dutch Oven for 1 hour at 450 degrees. After proofing, gently flip bread over onto parchment paper. Dust the top with flour. Score loaf with a razor. Pick up corners of parchment paper and transfer to dutch oven. Bake for 30 minutes at 450 degrees F. Remove lid and cook another 5-10 minutes depending on how well done you prefer your crust.
12. Option 2: After proofing, cover your dough and place in refrigerator for 12-18 hours. This slow fermentation will break down the flour further for those who may be more gluten sensitive. Remove dough from fridge 1 hour before baking. During that hour, allow your Cast Iron Dutch oven to preheat in your oven at 450 degrees. Place parchment paper over your dough and gently flip it over onto the paper. Dust the top with flour. Score loaf with a razor. Transfer to dutch oven in the parchment paper and bake for 30 minutes. Remove lid and cook another 5-10 minutes depending on how well done you prefer your crust.
13. Cool on wire rack and enjoy.
Notes
To keep the crust crispy after you cut into it, simply place loaf cut side down on a plate and leave the rest open to the air. This will keep the inside fresh and soft and keep the outside nice and crispy.
*Always use a Cast Iron Dutch Oven.
In the words of my 8 year old, “This is the best bread I have ever eaten!” Let me know in the comments if you feel the same.
PIN FOR LATER:
Links:
*This post contains affiliate links that I make a small commission on but it is at no additional cost to you.
Kitchen Scale (Less expensive option that I still use and love)
Kitchen Scale (My newest scale)
 Skip to Recipe
This recipe is amazing!! I just made my first loaf and it turned out perfect the first time. I was worried all day and kept thinking I messed it up somehow and it wouldn’t turn out, but it turned out great.
I didn’t use a Dutch oven. I followed your directions for the other way and it worked great.
Highly recommend this recipe!
For Option 1 it doesn’t specify the oven temperature. I’m guessing 450? And does the Dutch oven have to be pre heated with both options or just the 2nd one? I’m looking forward to trying my first loaf!
Yes, for the first option bake at 450 degrees F. And preheat the Dutch oven for both options.
Just tried making sourdough bread for the first time! I thought I’d ruined it as it fell when I scored it. However, it bounced back and ended up turning out better than I thought it would.
Yay! That’s so great to hear! Sourdough is so resilient
I would like to make a half loaf, any idea how I would change the cooking time?
Can I mix multiple loaves at the same time?
Absolutely! I often make 2-3 loaves at a time. Just be sure to ferment in a large enough bowl or container
Thank you!!! We love your recipes and i share your website all over my community as i gave extra starter to everyone that will take it!
Wow, I love this so much! Starter makes the best gift!! thank you for sharing!!
My first attempt was a little disappointing. It tastes great, has a wonderful crust, but only rose about 2 – 3 inches. I’ll try again in a few days.
Oh bummer. I’m sorry. There are so many factors to consider with sourdough. Time, temperature, starter maturity. It can be a lot of trial and error but it’s well worth the learning curve. I hope you have success next time!
This was delicious!! Another hit with the family too, thank you!!
Love this! Thanks for sharing!
Thank for this great tutorial. My first attempt came out really good, even though my starter failed the float test, and I learned a lot. The bottom of the loaf did get a little darker than desired though. I use a Lodge cast iron Dutch oven (not enamel coated) and will try double parchment on the bottom or perhaps my enamel coated one next time. Any suggestions ?
I have bookmarked this site and will continue to reference it. Thank you again for a great site.
I love to hear this! No need for an enamel coated dutch oven. I suggest placing a thick cookie sheet or pizza stone on the rack below your dutch oven next time you bake if you’re experiencing a darker bottom on the bread. That should help. I’m glad to be a great reference for you 🙂
I just made my first loaf! I was super anxious the whole process but the final product came out great! I have a lot of growth to do in my baking but this was an excellent start! Thank you!
yay, so glad to hear this! The best way to learn and improve is to do, so just keep baking. You’ll be a pro soon! 🙂
This is my first attempt and I want it to be good! But I don’t have a cast iron Dutch oven. Mine is stoneware. Is that ok? I have a cast iron pan but not a Dutch oven. What will be the effects of cooking it in a stoneware covered Dutch oven? Your instructions have been super helpful!! Thank you!
Stoneware should be just fine! As long as it can withstand a high temperature, but I don’t see why you couldn’t use stoneware. Happy Baking 🙂
Amazing! I received a sourdough starter as a gift. My family loves sourdough bread but I never thought I’d be capable of making a homemade loaf. Landed on this page, followed the directions and wow! I have some work to do to perfect it but my first try was gorgeous and delicious! Thank you so much!
Wow! I’m so excited to hear this review! I’m so proud of you too 🙂 Welcome to the wonderful world of sourdough! Thank you so much for sharing!
I have a pampered chef covered stone baker that holds 900 grams. Do you think I can use it for this or will it be too small? Could I just divide this recipe into two instead? What would be the baking time for that?
Hi Jamie. Is it a shallow baker with a lid? They have so many versions, I’m not sure what exactly you have. But Sounds like it may be okay. However, if it’s shallow, your bread may stick to the top. You can certainly half the recipe the first time to see how it cooks and based on that then do a full loaf the next time. For the divided recipe: Reduce cook time only about 5-10 minutes but just watch it. Once it’s golden brown it will be ready.
Thank you for great instructions, I will make my first attempt tomorrow. I noticed you are using regular flour, not bread flour? Does it make a difference?
After the 4 stretches, it says to proof and gives 2 options. Is putting in the fridge after the 3 hr proof? Or can you put it in the fridge before the proof or half way thru the proof. Thanks
Put in fridge after 3 hour proof 🙂
After the 3 hour part, it did rise in volume, but it was a wet sticky mess, and won’t hold it’s shape. Not sure where we went wrong, all measurements were precise using a digital scale.
Trying to salvage, but definitely in foreign territory. Lol
That can happen if your dough is over proofed, it gets very sticky and actually just happened to me! So I applied a little avocado oil to my counter to shape the dough, and also oiled my hands a bit. (a little water works too) This helps combat the stickiness. Not sure if you used bread flour or not, but using a higher protein flour helps absorb the liquid as well yielding a less sticky loaf too. Also, next time watch your dough more than the recipe time and when its close to double in size, its ready for shaping. Sourdough times vary depending on the temperature of its environment. So always pay close attention to the dough, more than the time. Sorry you dealt with a sticky mess but I hope these tips are helpful for next time!
Does the size of the Dutch oven matter? Mine is very large (7.5 qt). Will it cause the dough to spread out, making a flatter loaf? Thank you!
That’s exactly what I use too, and no, it shouldn’t spread the dough out 🙂
What temperature is your home normally? I have made this recipe many times and have had allot of great loafs, but sometimes I wonder if my loafs are over proofed or under proofed. I’m thinking the temperature may be affecting it?
Temperature plays a large role when it comes to proofing sourdough. My home is around 70 degrees in the winter. Here are some troubleshooting tips: When you’re shaping the dough after the first proof, and it feels very sticky, it’s likely over proofed. In this case, you can either ferment for a shorter duration, or use less starter initially so it doesn’t ferment too quickly. If it’s under-proofed, your dough and bread will be dense and gummy, so then you’ll want to ferment it a little longer and/or give it some warmth during the ferment to give it a better rise. I hope you find this helpful and you can get back to those successful loaves again!
First thank you for laying out such clear instructions to follow. My friend gave me some starter and I made my first loaf today. The dough raised at each interval. I noticed that he dough was sticky from the get go so I used a plastic scraper to do the four folds at each stage hoping it would tighten up. When the final proofing came I placed the dough on the counter it was so sticky I ended up adding some more flour. I am planning on placing in the fridge after its final rise to be baked off tomorrow.
Question is it okay to bake it and is there an internal temperature the bread needs to be to make sure it’s not raw.
Thanks for any advice.
This recipe is a higher hydration, so it will be a little more wet to handle. But also over proofing can lead to a sticky dough as well. But to combat any stickiness, you can try to grease your hands and surface area when shaping. If you’re cooking your bread straight from the fridge, you can add 10 minutes to your baking time to ensure it will be fully cooked. Checking internal temp with a thermometer would be around 205-212 degrees F.
Hi,
I don’t have avocado oil. Could I use olive oil instead with the honey to keep it soft?
Thanks
You could, but I recommend the avocado oil because you will be baking the bread at such a high temperature, and avocado oil has a higher smoke point 🙂
Just made my first loaf and it was delicious! Thank you for the simple, well organized instructions! I was nervous every step of the way that I was going to mess it up but was shouting for joy when I pulled it out of the oven! My husband said it’s the best bread he’s ever tasted. Will be making another loaf very soon!
Awesome Sarah! Love to hear how much you enjoyed 🙂
If I want to make more than 1 loaf at a time, do I just double or triple the ingredients? may sound like a silly question, but asking anyway. 🙂
No questions are silly 🙂 Just Double the ingredients to add another loaf 🙂
I love this taste of this bread but I was wondering why you use 175 g of start instead of 100 g which I have seen in other recipes? Does the amount of starter really make a huge difference ?
You can use more or less than the starter amount in sourdough recipes. A Higher ratio of starter will ferment your bread faster. You can certainly use 100g in this recipe, in fact that is what I mostly do now too 🙂
When you go with 100 g starter do you use 300 g water and 450 g flour with 10-12 g salt or change the amount I have been using your recipe with 175 starter and love it but I only bake once a week, keep my starter in the frig and I never leave to much extra starter
Can the unbleached flour be all-purpose or does it need to be bread flour?
You can use all purpose flour, you just may not get the rise like with bread flour but it will still work. However, if you’re all purpose flour contains a high protein (like Costco’s brand) then it will work similar to a bread flour and work great 🙂