
I’m so excited that you want to start your own sourdough journey! Below I have detailed instructions on how to start your own sourdough starter. I’ve broken it down by days, and made it as simple as possible. If you would like to read about the benefits of sourdough, you can click here to visit my Why page to learn more.

This is a 7 day process. You CAN do this!
Let’s get started!
If you Prefer video:
What you need to get started:
½ cup unbleached wheat flour (do not use enriched, and I always recommend organic)
¼ cup filtered water
Glass mason jar
Additional ½ cup flour and ¼ cup water per day for maintaining your starter
Day 1:
Note: I started my starter in the evening, but any part of the day is fine, just pay attention to the hours.
Add ½ cup flour and ¼ cup water to your jar. Mix thoroughly with wooden spoon or rubber spatula to scrap down sides of the jar. (Avoid using metal utensils because it can react with the natural yeast and bacteria you are trying to grow) You may need to add 1T more water so the flour is completely mixed together. Cover jar with tea towel and rubber band. Leave jar on counter for 24 hours at room temperature.
*TIP: keep in a place within your home that stays warm. Ideally between 68-75 degrees. Sourdough thrives in a warm environment!
Day 2:
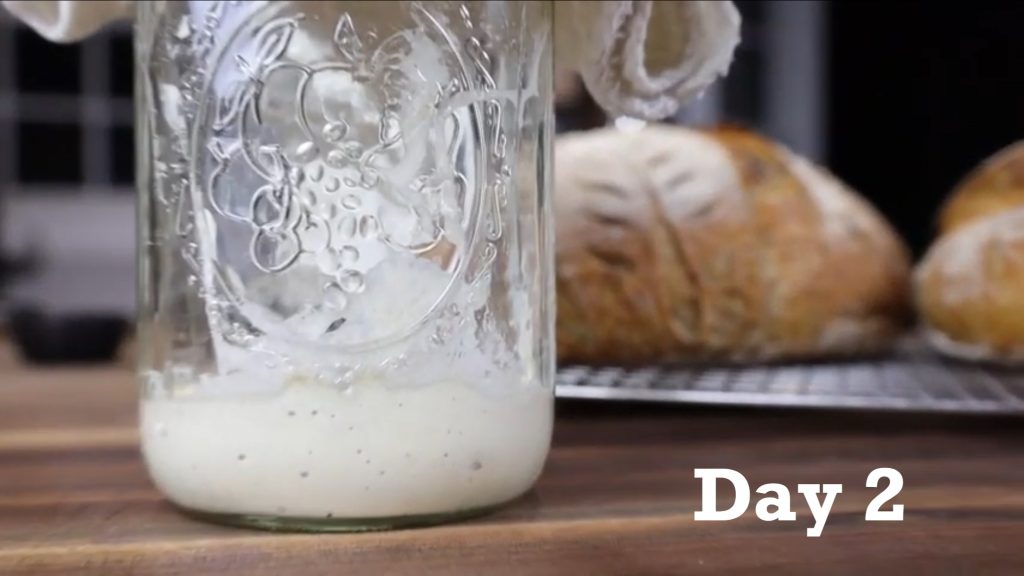
Today we are going to discard (completely throw away) ½ of the mixture. Sounds wasteful, but we need to give our mixture a fresh start. So throw it away and don’t think of it again. Next we are going to do what we did yesterday. Add ½ cup flour and ¼ cup water to your jar. (You shouldn’t need to add more water, but if you do, add 1 tsp at a time) Mix thoroughly and cover with towel and rubber band. Today I’d like you to mark the top of your mixture on the jar. Mark with either a rubber band around your jar, or a colored piece of tape. We’ll check your jar for any potential bubbles and growth tomorrow. Again, Rest on the counter in warm area for another 24 hours.
Day 3:
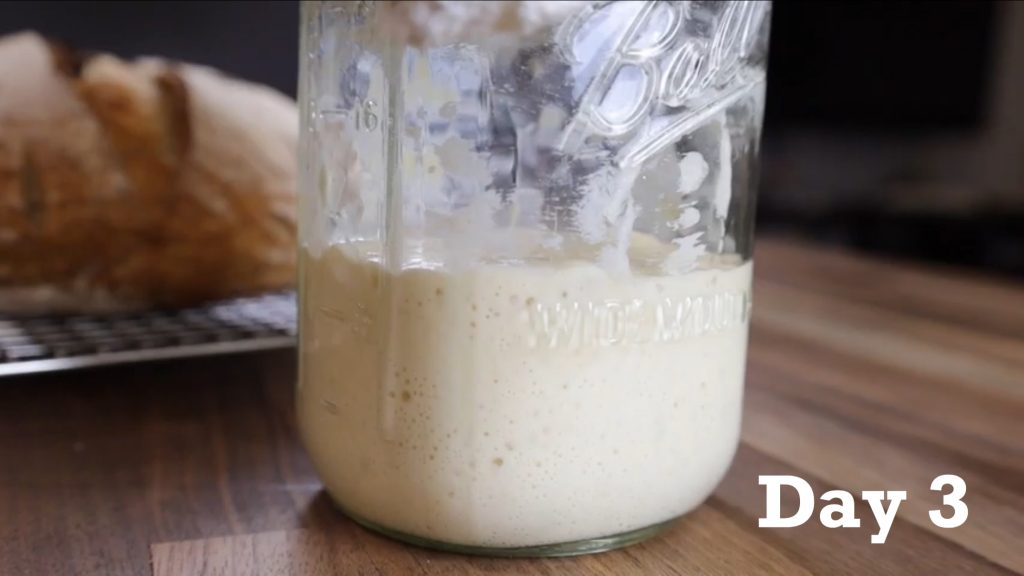
Do you see any bubbles? Has your starter climbed up the jar and grown at all? If not, no worries. You may see this tomorrow. Today we are going to discard half of the mixture again. Add ½ cup flour and ¼ cup water to your jar. Mix well. Cover with towel, mark your jar at the top of where your mixture starts. Rest in warm area for another 24 hours.
Day 4:

Hopefully you see some happy little bubbles and growth today. Discard half of your starter, and add ½ cup flour and ¼ cup water. Mix well. Cover, mark your jar, and rest for 12 hours. (NOTE: Now we are going to start feeding every 12 hours!)
Day 5:
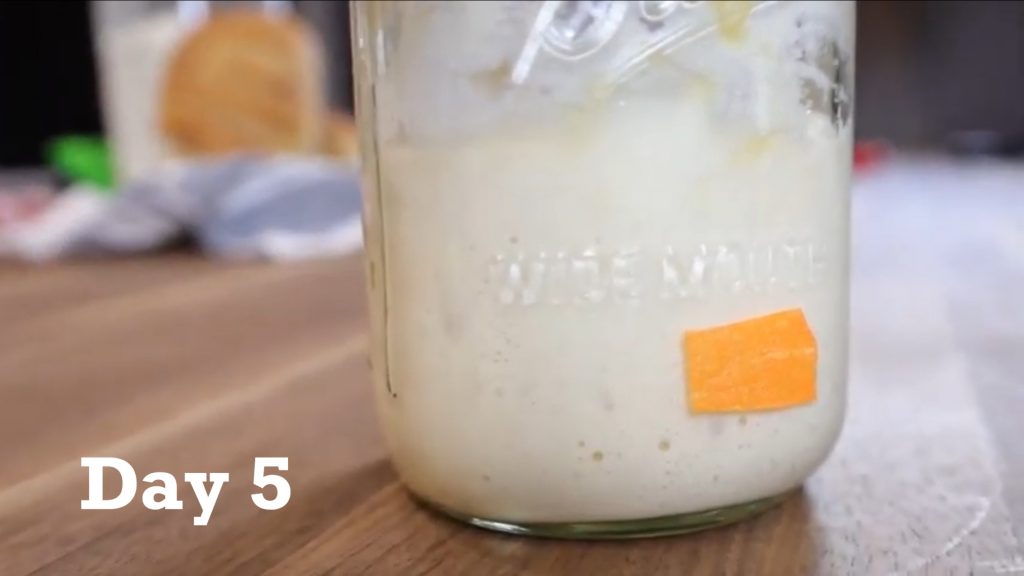
**if you don’t see any bubbles or growth, you can try to leave your starter alone for an additional 24 hours. If you see growth, start at day 5. If you see no growth, sadly you may need to completely start over**
Feeding 1: Discard half of your starter and add ½ cup flour and ¼ cup water. Mix well. Cover. Mark your jar. Rest for 12 hours.
Feeding 2: Discard half your starter. Add ½ flour and ¼ cup water. Mix well. Cover. Mark your jar. Rest for 12 hours.
*TIP: if your starter has grown, you have enough activity to use the discard in a single pancake recipe. Below I have this quick recipe for a single pancake that will make you one delicious snack today! This way you won’t feel so wasteful with that discard, and your belly will thank you 🙂
Day 6:
Feeding 1: You may be smelling a delicious, sour, yeasty scented starter now. And hopefully you are seeing a lot of bubbles and growth happening! Get excited, you’re getting so close! This is your last day to discard half of your mixture (yay!). Add ½ cup flour and ¼ cup water. Cover. Mark your jar. Rest for 12 hours. (go ahead and make another delicious pancake with your discard)
Feeding 2: Discard half your starter for the final time! Add ½ cup flour, ¼ cup water. Mix well. Cover. Mark your jar. Rest for 12 hours.
Day 7:
Congratulations! You have made it to mature starter status! Seriously, I hope you’re celebrating, because you have an exciting future of delicious baking ahead of you!! Give your starter another feeding. No need to discard. You’re ready to bake!
Sourdough Discard Pancake:
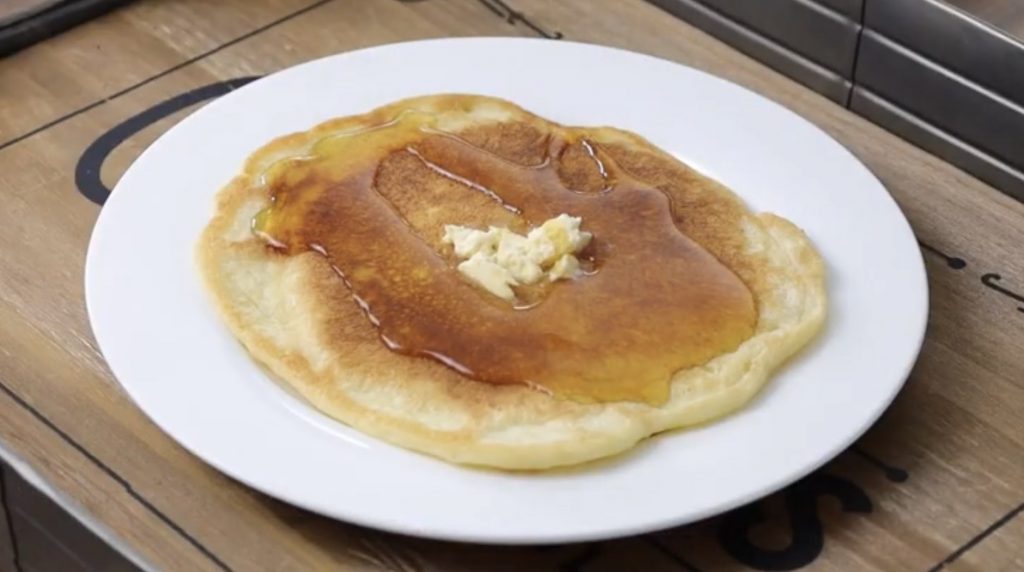
- sourdough discard
- 1 egg
- 1 T melted coconut oil or butter
- dash vanilla
- pinch of baking soda
Mix well. Cook in coconut oil on preheated skillet or griddle. Enjoy!
TIP’s:
• When using your starter in a recipe, make sure you don’t use all of your starter up. Remember to keep some starter in the bottom of your jar to feed again and maintain. If you use it all up in a recipe, you obviously won’t have any left to keep using, and you would have to start all over. Let’s not make that mistake, ok??!! You have been warned!!
•Moving forward, you may feed your starter the same way you have been. But I highly recommend purchasing a kitchen scale. Sourdough thrives with precision from here on out. And most recipes call for measurements in grams. I feed my starter equal parts flour and water (for the record, that’s 100% hydration) a typical feeding for my starter is 50 grams flour, 50 grams water. Below I linked two scales that I highly recommend. I have both scales, and both perform the same.
•I also recommend moving your starter into a half gallon mason jar, or a larger bowl. This allows your starter to grow without having to worry about overflow from your jar. And when a recipe calls for a whole cup of active starter, a half gallon jar is plenty to build up and still leave some starter in the bottom to maintain.
•When recipes say “active starter” this means that your starter has been fed at least 3 feedings, and is active and bubbly enough to bake with.
•When recipes say “unfed” starter, this is starter that has not been recently fed, or just pulled from the fridge. You can not bake bread with unfed starter. Your starter needs to be active.
You have your own starter, now what?
Option 1: Keep your starter in the fridge until you’re ready to bake. But DO NOT put your starter in the fridge right after you feed it. Give it time to ferment and break down the flour for a few hours before adding to the fridge. The fridge puts your starter on “hold”. You may remove your starter a few days prior to when you want to bake. You will feed equal parts flour and water every 12 hours. I recommend at least 3 feedings before attempting to bake with your starter. This ensures an active starter that will be strong enough to rise your bread. Promise me that you will not put your starter in the fridge, and leave it there so long it gets shuffled to the back and it feels like a chore to take it back out and start again. Remember it takes a minute or two to feed morning and evening, it’s so SIMPLE! So promise yourself you will not let this happen!
Option 2: Keep your starter on the counter and feed it every 12 hours. This option allows you to bake on demand and when you need. However, since you will continue to feed it twice a day, you will have a lot of active starter that you need to use. It can add up quickly. This is the option I use because I bake with my starter almost daily. I have converted all my conventional yeast recipes into sourdough, so it’s not hard to use my starter daily. I maintain feedings with 50 grams flour, 50 grams water. I pay attention to what recipe I want to make next. If it requires a full cup of starter, I may feed my starter 100 grams flour and 100 grams water. That way I have some starter still left over.
I hope this gives you a detailed overview of moving forward. I’m here to help and answer any questions you have.
If you begin your journey, I would love to hear and cheer you on!
If you’re still wanting to learn more before you get started, check out my beginners guide for sourdough where I answer all your early questions and help prepare and give you confidence to begin your exciting new journey! Click here for more “I have a sourdough starter, now what?”
Pin for Later:

Links:
*This post contains affiliate links that I make a small commission on but it is at no additional cost to you.
Sourdough Starter from Cultures for Health : if you’re impatient and prefer to purchase your own Sourdough Starter
Kitchen Scale : (Less expensive option, I still use and love)
Kitchen Scale: (This is my newest scale and love it too)

Best place to buy a gallon size mason jar? Wide mouth? Extra wide mouth?
Walmart has great prices on mason jars. But I actually found the BEST jar for sourdough at IKEA a few weeks ago. It’s 7.5 inches tall with a 5 inch opening at the top. You can choose from a variety of lids to go with it. It’s probably around a gallon size jar. But that large mouth opening is key for reaching in with a cup and scooping sourdough out. Highly recommend!
Do you ever change jars? I’m getting a little worried about the condition of this starter jar.
Yes, you can change your jar anytime. Some change it weekly, I change mine every few weeks and it’s fine. Just gets a little crusty after a while.
On what day can I give the discard to a friend to start their own starter? Do they just pick up where I left off if say I give them the discard on day 3?
I don’t recommend sharing a starter until it’s mature. I’d wait a few more days until it starts to grow and become active. Then you can share it 🙂
So after the seventh day, you can just keep adding and no discard? And after the seventh day do you still need to feed it twice a day or once a day? And what can I do if I want to refrigerated it? Do I need to feed it once a week and put it back or what? I’m still learning about sourdough and been reading a bunch of articles about it.
You no longer need to continue discarding after you have a mature stater. It is best to keep it thriving and feed it twice a day. If you miss a feeding, it’s okay. But if you’re keeping it out on the counter you should feed it twice per day. Otherwise keep it in the fridge until you’re ready to use it. I have a second post that answers a lot of beginners questions here.
My sour dough starter has lots of bubbles and is growing nicely and it floats, however it doesn’t smell like really anything, maybe just like flour and water paste??? Am I doing something wrong an/or is this OK to start to bake with?
awesome, sounds great to me! It may get more of a yeasty smell as weeks go on. Especially if you miss a feeding, the scent becomes stronger.
Hi,
I reached my 7th day and my starter was mature and I discarded and fed it 1/2 flour and 1/4 of water will it still work?
Yay, congrats on a mature starter! From here on out you can feed it using equal measurements flour and water with a kitchen scale. And you are ready to start baking!
My starter rises great, however it seems very wet. I am on day 6. Can I fix this or do I have to start over
You can add more flour next time! You’re almost there. My next post “I have a sourdough stater, now what?” explains how I feed my starter after gaining maturity.
This is a great recipe! My starter is very happy! I’m only in day 4 and already it is practically tripling in size. Do I continue with steps through Day 7?
Yes, continue with the steps, because it can be common to loose it’s activity around 4-5 days, so continue with the rest of the days to ensure you have an active enough starter to bake with once the week is over 🙂
Once I’ve reached a matured sourdough starter & flip to feeding 50 gram water & 50 gram flour how often should we be feeding it? I leave mine on the counter.
Also, how much do I need to leave (after I take out what my recipe calls for) from the first batch in order to continue to grow that starter?
If you’re leaving it on the counter, you need to *feed* it every 12 hours. You can leave as little as 5 grams (approx 1 tsp) left behind to regrow your starter back. I recommend checking the recipe you plan to make with your starter and feed your starter accordingly. for example, If the recipe calls for 200g starter, be sure you’re feeding your starter at least 100g flour and 100g water to equal 200g starter which is what the recipe calls for. This way you have enough starter for your recipe, and will have enough left behind to regrow. Hope this is helpful, Happy Baking!
Curious if you’ve ever tried to make a starter gluten free?
I haven’t. It is a whole different baking world and I am unfamiliar. Sorry
If u only remove 3/4 starter to bake with, why do you double the feeding? Do u discard any? How do u know how much to feed with after you remove some to bake with??
Alrighty, starting over for the 3rd time! I will get this right ! Obviously I missed something the first few times. This time I watched your video and it was very informative. Thank you. Today is Day 1, again.
Great! Third times a charm 😉
Hello, I’ve successfully made sour dough starter, I placed it in the fridge for 7 days
I pulled it out and feed it 2times,, it really smells sour, is it supposed to?
Thanks Jody
Hi! Love that you made a starter! It can smell sour after coming out of the fridge. I recommend discarding half or even 3/4 of it and giving it a big feeding and it will come back strong and not smell AS sour.
Hi there!
I’m on day 6 and at every feeing it has had a lot of bubbles and smelled sour, but this morning, not so much bubbles or as strong of a smell. After I fed and discarded, the smell was basically just the flour. Did I mess it up? Or should I just keep going? Also when should we try the float test? Day 7, before we feed and discard?
I’m keeping it inside my microwave that’s about 73 degrees inside when the outside light is on.
Thank you!
Hi Aisha. If you haven’t already, I suggest using a scale to accurately measure your flour and water amounts for the remainder of your feedings. The precise measurements may help. You can try the float test after a few more feedings to make sure your starter gets nice and active first.
Ok, thank you! So that would be 50g flour and 50g water?
In the video you use 1/2 cup of flour and 1/4 cup of water, but when I read the directions it says to use equal parts flour and water, so I’m a little confused.
Hi Kim. When starting your sourdough starter and BEFORE it’s “mature status” I say to feed it 1/2 cup flour and 1/4 cup water. Then after it’s mature you will feed it equal parts flour and water with a scale. If you’d prefer, you may use a scale starting on day one and measure out equal parts flour and water each day and continue with the blogs directions with discards. Hope this is more clear for you.
I am not sure if the glass kat is to be tightly covered or have a loose cover or cloth ?
Lightly covered. I just lay plastic wrap over the top. I keep mine on the counter, if you put yours in the fridge you should cover it tightly.
Can this be made with all purpose flour?
Yes, organic all purpose flour is what I used to make mine
Hello!
Question, have you ever used a bread machine to make your sourdough bread?!
Thank you!
No, I never have. Sourdough operates a little differently, therefore I don’t fine a bread machine necessary. There may be some recipes out there for you if you’d like to try. I actually got rid of my bread machine once I made the switch to sourdough. Never gone back!
My starter is on day 7 but it’s not full of bubbles. There are some and small growth. What do I do
Give it 24 hours between the next feeding. It may need some time still. And keep in the warmest place in your house
I what do you mean by on day 5 and 6 when you say feeding 1 and feeding 2?
I used whole wheat flour like the recipe states- I’ve gone through the 7 days and got some rising mostly on day 2 and very minimal the remaining days, just bubbles. It doesn’t smell sour or has passed the water test. Is it no good?
Hi! The recipe states unbleached wheat flour. Whole wheat is different. While you can used whole wheat, you just need to adjust the water ratio and add more because whole wheat absorbs more water. You have Two options: First, If you’re determined and you still see bubbles you can switch flours at this point and try using an unbleached bread flour (King Arther is great because it yields some barley flour which is great for a starter) Continue feeding/discarding twice per day. And try using a scale in grams for accurate measurements. Discard 80% each time (yes 80%) and The amount of flour in grams added, is the amount in water you will add too. Continue this until you see a bubbly growing starter. Option two: Completely start over. This is common so don’t be discouraged. You have more of an understanding second time around so it should work for you! Hope you find this helpful 🙂
Love this! This is the first place I could find that the steps were clear to understand and really easy to follow. Great job explaining this and thank you!
Yay! So glad to hear.
Hi, my growth slowed down on day 5 so I fed and continued letting it rest and on day 6 it became more bubbly and showed more growth so I’m starting the 12 hr feedings now. Is my starter still good? Smell is great and no signs of mold.
Hi! I followed your instructions, I had bubbles and growth and I did the float test On day 7 and it sunk 🙁 I fed it and going to see how it is tmw and try it again but do I have to start over?
Thank you!
Sourdough starters can take a few more days to peek. Keep discarding and feeding a few more days. As long as there are bubbles and its growing that’s good! Don’t start over. Keep going and try again in a few more days
HI I have a few bubbles on the sides but a lot of bubbles on top. Is it still good?
sounds perfect–keep going!
Can I use unbleached bread flour or does it have to be all-purpose?
Yes, you can use bread flour!
Hey! Quick question for clarification: so after my starter has reached mature status, I don’t have to discard any of it, right?
Thank you for all of the tips, I’m so excited to make some sourdough bread!
Correct–no need for discarding after it’s mature. Congratulations and happy baking!
Hello! I am on day 7 and have not seen much growth since I started two feeds a day at day 5. There are still bubbles and it has the sour smell, but it did not pass the float test. Should I go back to 1 feeding a day? Do I need to start over?
So, once I have the starter established, and used some for baking, can I just add whatever amounts that equal the next recipe I want to do to the left over starter? Or do I need to slowly add in the flour and water in portioned out time/days? Is there a limit as to how much water and flour you can add to the leftover starter?
Hi! Yes, that is what I recommend doing is feeding your leftover starter the amount needed for your next bake. There is no limit as to how much water and flour you need to add to your starter. A small amount of starter will amazingly feast off even a large feeding of flour and water. I recommend reading two of my other posts called “How to feed your sourdough starter” and “I have a Sourdough Starter, Now What?” Where I go into more detail about feeding ratios, I think you will find them helpful. Search those post titles in my search bar on the website. 🙂
Hi! I am going to attempt this starter. My issue is that my work schedule very odd, and I homeschool 2 littles along with different activities they participate in during the week. Maintaining a strict 12/24 hour feeding schedule may prove difficult. If I happen to be within an hour or two of that window, will that be ok?
Absolutely! You can allow several hour windows on each side. It’s not strict to exact timing at all! Give it a go–no better time than the present to start 🙂
If you store the starter in the fridge for a few days, when you take it out do you need to wait until it is room temperature to start feeding it prior to baking?
You do not, just feed as normal. It will all come to room temp fairly quickly after its fed.
Hi! I’m on day 4 and my starter is doing great! However, it is very sticky and quite a challenge to get any out in order to discard. Is this normal? I guess I expected it to be more like a thick liquid than so sticky. Thanks for your help. I can’t wait to try baking!
yes, it should be thick and sticky. Sounds like you’re doing it right, especially if you’re seeing growth!
Can you freeze mature sour dough starter?
Yes, but you have to dehydrate it first.
I’m so excited. I just made my first starter and it looks great. I’m on day 7 and just fed my starter. How long do I have to wait to bake after feeding?
Yay~congrats! Depends on the temp of your home but usually around 4-6 hours your starter should peak and you can use it to bake with. Happy Baking!
Hello! I was wondering how long you should wait to use your active starter after feeding?
It depends on the temp of your home and the ratio to which you’re feeding your starter. But it usually takes between 4-6 hours, again, unless it’s a big feeding in which case it would take longer and maybe closer to 9 or 10 hours. You can always try the float test to see if it’s ready to bake. Simply place a small spoonful of starter into a cup of water and if it floats, then it’s active and ready to bake. Hope this is helpful
I’m on day 4 and all is well. If I plan to make bread after the starter is mature, do I need to be feeding with more than the 1/2 cup flour & 1/4 cup water? I want to be able to do o use it and still have some left to feed & and use. I looked a a lot of step-by-step directions, but yours was explained the best & the easiest to follow. Thank you!
Hi! Yes, you can increase the feeding to a cup of flour which equals about 150g flour. Then feed it equal parts in grams with water. I recommend using a kitchen scale to get more accurate measurements after you have gotten to mature status. You could even use a kitchen scale now in the last half of your “how to make a starter” journey. Each day the directions tell you to feed your starter 1/2 cup flour and 1/4 cup water, you can use a scale and feed it equal parts flour and water in grams instead. You don’t have to, especially if what you’re doing is working. Just giving another option that would work too because moving forward after you have gained maturity, you will use a kitchen scale to begin baking. I hope this is helpful.
Just wondering if you have a tutorial on making a loaf of sourdough bread?
I’m new to this and it’s day 6 of making my starter. It’s not increasing in volume but is bubbly. Is that ok? How much flour & water ratio should I be using to feed if I plan to make bread soon?
If your jar is large in size, that could be why you aren’t able to measure growth well. You can always discard 50-80% then give it a large feeding of 100-150grams flour and water. You should see growth then. Typically a bread recipe requires between 50-200 grams starter. So when you feed your starter just do the math and feed your starter a similar feeding in grams as the recipe calls for. Then you will be sure you have enough left over as well for another feeding.
I can be found on instagram @SimpleisGourmet and have a few videos posted to my highlights on how I make my bread.
Thank you so much! This is day 7 but I won’t be home to feed tonight or tomorrow morning. I’m hoping my starter is ok. My husband is a minister and we travel, so it’s hard to plan a perfect time!
When you throw away half, do you measure it or just eyeball it?
Eyeball it. Close to half will be just fine.
I just want to say this was the easiest and most detailed recipe to follow. Your step by step plan each day was so easy and understanding for a new beginner like me. I made my first successful starter using your recipe. So thank you! I highly recommend to everyone that wants to start baking.
WOW! Thank you so much Angela! I’m so happy to hear this–you’re so sweet. And yay for a successful starter! Welcome to your sourdough journey! Happy baking!!
Hello! Just reached mature stage on my starter. However, on day three I noticed great growth, almost doubling in size. Then the remainder of the days the starter still grew, but just slightly. I am wondering if this is okay or if I need to start over? Thanks!
Keep going! No need to start over. It’s just the eb and flow of a beginner starter. You can give it a higher portion feeding of flour and water and you may see more growth.
After the 7 days and you feed it do you still take 1/2 out or just feed it?you feed it twice or once after the 7 days?
Keep taking 1/2 out, but don’t throw it away. Use it in sourdough discard recipes. If you leave your starter on the counter you need to feed it twice a day.
I started a sourdough starter over a month ago and all is well. I put it in the frig last night and notice it dropped, is this normal? Also, do I put a tight lid over it in the frig? I have had the starter drop after it rose on the counter before, is this normal and if not what do I do to remedy it? Thank you for your great instructions.
Yes it will drop in the fridge. Totally normal. Tightly cover when it’s in the fridge and then pull it out and feed as normal and it will rise and bounce right back.
I am on day 4 of my starter. It is progressing nicely, however, the top hardens during the night. Is this normal?
Try covering it with a lid instead, this should prevent it from drying out
I’m going to start with your instructions today – I used to make bread in a bread machine but my sourdough was never sour enough- I am hoping this time, with just basics, it will be better. Thanks
Betty
Hi I have tried multiple times to do a starter and failed. Thanks to you I have finally got am active started. May I ask how you have converted recipes over to sour dough?
Yay, this is wonderful news! I’m excited for you too! Welcome to the wonderful world of sourdough. I have lots of sourdough recipes on my website that are simple and easy to follow. I hope you give them a try 🙂
I have started the sour dough starter journey and forgot to discard half a n the fourth day. I just fed 1/2 c flour and 1/4 c water. Do I need the start over?
Disregard my question. I started over. Thank you for the step by step recipe. I can’t wait to use your sour dough recipes.
If you forget next time, or anyone else reading with this same question, don’t worry about it. Just keep going 🙂
I like this video, but unclear why we are throwing away the discard the first few days
Thanks! It’s because it is not an active starter yet. There is nothing you can do with it just yet because it’s not yet active enough to bake with. It takes several days to activate and proliferate the yeasty microbes to make them ready and hungry enough to rise a loaf of bread. Fermentation takes time and lots of patience 🙂
Where do you buy your wheat flour? The only options I see everywhere is whole wheat or all purpose flour. Help!
I make my sourdough starters with organic all purpose wheat flour. Whole wheat can be tricky to feed a starter because it requires more water (the whole wheat absorbs more water than all purpose). I feed my sourdough starter everyday with organic all purpose wheat flour. You can also use bread flour. Hope this is helpful
I have a mature starter, I’m on day seven. My understanding is that every feeding you do you still discard half for the length of the starters life?
Nope! Once you have a mature stater, there is no need for discarding half anymore. You’re ready to use what you have created to bake with 🙂
Hey honey, thank you for the recipe!!! There’s no yeast or anything is that normal? Also, with the discard after you hit maturity can you use that discard as someone’s “new starter”?
Bless you and your family!!!
Good questions! The little bubbles you see in your new starter is the “yeast”. It’s a natural yeast, so consider your starter as “yeast”. You remove some each time you want to bake and that is what will rise your recipes. Remember to always leave some behind to grow back and keep it going! And yes, the discard, after you hit maturity, can be used as someones new starter. Share with everyone and anyone who wants it! The more sourdough bakers in this world the better 🙂 Enjoy!
So far i can tell you DO NOT smell it on day 1-4 hold your breath till you close the jar 🙂
Hi! Everything was going perfectly with bubbles and growth and when I woke up after the first day of feeding after 12 hours, there are barely any bubbles and no growth. What happened!?
Give it a little longer, it may need another 12 hours.
Once the starter has matured do you keep the cheese cloth on the jar or do you than put the lid on it?
Use a lid from now on otherwise it dries out.
I just mixed my water and flour together but its very sticky and not laying flat in jar. Will it rest after a few minutes or did I mess up?
No, you did not mess up. Yes, it will be thick when you first mix it but as it ferments it relaxes
Thank you! This is themes straight forward clear instruction I have found.
BUT…!! Seems the journey is not to be quite so flawless. I wonder if you can help.
I was given a starter from an experienced baker. Refrigerated it for 2 days before ready. On taking it out in the morning I fed as per your instructions. This bubbled and increased in size nicely. I ended up not being able to bake that evening so fed again leaving it on my bench top. Again, activity and in morning it was twice the size if not more. All ready to bake I thought – oh, float test. Yes, do that first. SUNK.
I have discarded half my starter and fed again with 1/4c water and 1/2c flour. Was this the correct thing to do? Is there anything else I can do? but mostly, why??? Everything looked perfect
Thanks in advance for your help and insights.
Raewyn
“the most”. Not “themes”. Apologies.
Let me assure you that it doesn’t have to pass the float test in order to bake with it! It sounds perfect! Especially if you got an already mature starter. I will only pass the float test at its “peak” rise. And if you miss that peak, it won’t float. But that doesn’t mean you can’t bake with it. It will still perform and rise your recipes well. It sounds like your starter is thriving and ready to use! So go for it and have fun 🙂